Video Compression Software – Learn how to compress video files without losing quality? List of top 5 best video compression software to compress video files without losing quality
If you like watching movies or videos in High Definition, there is one major problem and that is the size. Most of the videos and movies which are shot these days come in high definition. Slow motion cameras are also now available which help to shoot videos and movies in slow motion but add more to the size of the video. You will get the best quality with these cameras, but the problem here which one has to face is the big file size.
High definition movies take a lot of space on the hard disk drive and it will definitely become difficult to buy a new hard disk each month to store the movies. Even, if you having extra Hard disk drives or are having online storage space the problem will come when you will try to upload the video on Youtube as it will take a toll on your internet speed as well as bandwidth. The best option which one is having here is to compress video files.
If you are wondering how to compress video files without losing quality then you can take help of some useful video editing programs. Video editing programs are the software’s which will help you to edit the videos, cut them and even compressing video files without losing quality. There are several popular video compression software’s and today we are going to share with you the top 5 best software to compress video files without losing quality.
Related tips you might like »»
Top 5 Best Video Compression Software to Compress Video Files without Losing Quality
As we all know, large video files are actually very slow to upload and download from any source. So, if you are looking for some of the most popular Video Compression tools that can significantly shrink the video file size without losing quality then this guide going to help you in selecting the best and multifunctional video compression software for your PC.
The prime specialty of all these video compressor software’s are: convert video files from any format, absolutely free and very easy to use, compatible with multiple operating system (Windows, Mac, and Linux), and much more. So, let’s have a look at the guides of how to compress large video files without losing quality with these top 5 best video compression software’s:
(1) Handbrake
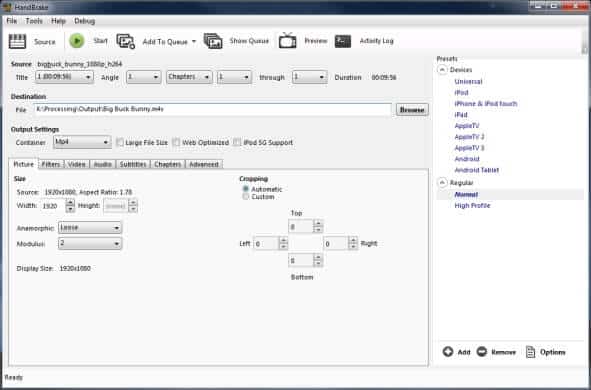
Handbrake is a very old and well-renowned video compression software which you can use to compress video files. The software is available for free and comes with a lot of great features. Using this video compressor software, users can easily change output and perform batch encoding, and also filter the videos.
Handbrake is perfectly compatible with almost all operating system like Windows, Mac, and Linux. If you are wondering how to compress video files without losing quality using Handbrake, you can have a look at the quick tutorial below:
Step (1): First of all, open the official website of Handbrake and start downloading the software for your corresponding operating system.
Step (2): Once downloaded, start the software and then locate “Search” button. You will find this button at the top left side of this software.
Step (3): Now you have to select the file which you want to convert by clicking on Open button.
Step (4): From the Destination, click on Browse and select the location where you are planning to save the output video. Make sure that the format of the output video is MP4. If you have selected any other video format, then you won’t be able to compress video files without losing quality.
Step (5): After that, go to the section which is gray in color as compared to rest of the app. You will see five buttons here. Select Video from here.
Step (6): Now you have to go to Quality and then select Target Size (MB). Here you have to enter the desired size of the file which you would like after conversion is done.
Step (7): Once you have completed all the steps, just click on Start button which is present in the top of the app. That’s it!
Thus, you can easily compress large video files without losing quality using HandBrake open source video transcoder.
(2) Avidemux
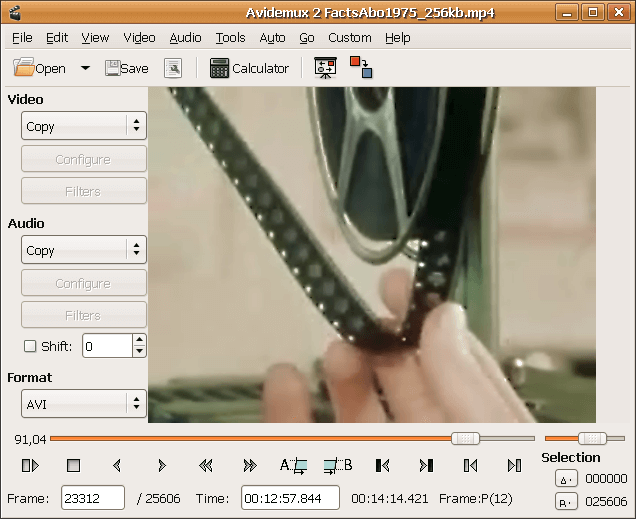
Avidemux is also a popular free video editor designed for simple cutting, filtering and encoding tasks. You can perfectly use this video compression software for compressing video files without losing quality. The best thing with this free video editor is that it supports multiple file types, including AVI, DVD compatible MPEG files, MP4, and ASF, using a variety of codecs.
Along with compressing video files, you can use this software for cutting the video clips, filtering videos, and many other operations too. If you are performing all the steps correctly, you will be able to convert even an 8 GB video into a 200 MB one. Let’s find out how to compress video files using Avidemux by following the steps shared below:
Step (1): At first, open the official website of Avidemux by clicking this link. Select your operating system and start downloading the setup file. If you are not able to download the file from the current server, you can select the other mirror server.
Step (2): Once the downloading is completed, start the installation. While installing this software, you will be asked about the components which you want to install. Proceed with the selected components and don’t select any new ones as they are sufficient to compress video files without losing quality.
Step (3): And once installation is completed, open Start menu and the launch Avidemux.
Step (4): Now, select the video which you want to compress and then drag it in the Avidemux app window.
If you want to convert more than one video, you have to perform the same steps. Make sure that both the videos are in the timeline and are located one after the other. In order to confirm this, you can simply check if the timer has been increased and it adds up to the total of both the videos.
Step (1): On the left side of the software you will see three boxes labeled, Video, Audio, and Format. Now you have to click on the drop down menu which is located under Video. Select MPPEG-4 AVC code from here.
Step (2): Now select the Audio tab and then from the drop down menu, select AAC codec.
Step (3): The format which you should select here is MP4.
Step (4): On the top of the software you will see Save video. Click on this icon and a box will pop-up will ask you about the location of the video where you want to save. Simply select the location and make sure you add .mp4 as the extension of the video otherwise you won’t be able to complete the conversion.
The editing time will depend on the size of the video and the hardware which is present in your system. We suggest you not to touch your PC during the conversion process as it will take more time for conversion then.
Avidemux free video editor is available for Linux, BSD, Mac OS X and Microsoft Windows under the GNU GPL license. So, if you think that this video compression software is suitable to fulfill your need of compressing video files without losing quality then download it right now.
(3) Free Video to Flash Converter
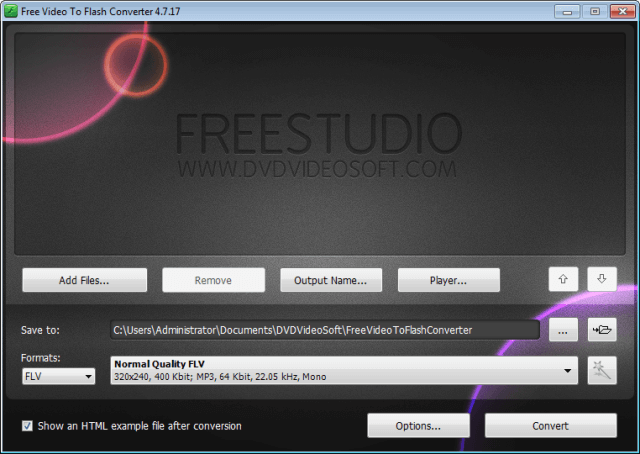
The next software to compress video files without losing quality is Free Video to Flash converter. This tool is used by some of the best websites like Hulu and Youtube. Follow the steps shared below and find out how to compress video files by using this amazing software:
Step (1): Firstly, Download Free Video to Flash Converter on your PC using this link.
Step (2): Once Free video to flash converter is downloaded on your system, you can begin the installation by opening the downloaded setup file.
Step (3): To install the software on your PC, you just have to select the location where you are willing to install it. Select the location and follow the instructions which the software is giving on the screen.
Step (4): Once the installation is complete, start the software and click on Add files button. Now select the video files which you want to convert.
Step (5): Once you have selected the video files which you want to convert, you will be asked to select a quality in which you want to convert the videos. There will be two options. Here you have to select FLV format. Once you have selected the format, choose the location where you want to save the output video after conversion by clicking on Save to section.
Step (6): You will see a small button with the wand on it. Click on it to access the compression settings. If you want to maintain the same quality, you have to select video bitrate 2 MB/s – 4 MB/s. The audio bitrate which you have to select here is 192 kb/s. If you want to shrink the final video size you can select 720p instead of 1080p.
Step (7): Press the convert button and the conversion process will be started.
Step (8): Once the conversion is completed, you will see that quality of the video is same however the size of the video is half.
Free Video to Flash Converter fairly compatible with Windows 8, Windows 7, Windows Vista, and Windows XP SP3 etc. This is one of the best software to resize videos without losing quality. I am using Free Video to Flash Converter from a long time and completely happy with its features.
(4) Virtual Dub
VirtualDub is a video capture/processing utility for 32-bit and 64-bit Windows platforms (98/ME/NT4/2000/XP/Vista/7), licensed under the GNU General Public License (GPL). It is also one of the best software to compress video files without losing quality.
This free software is only compatible with Windows operating system and can also be used for capturing videos. Follow the steps mentioned below to compress videos using Virtual Dub video compression software:
Step (1): Virtual Dub is available for free. You can download the software from this link. You have to install one codec too which is K-Lite Codec Mega pack which will ensure that the app will work properly on your system. You can install it by clicking on this link.
Step (2): Install the software by following the installation instructions given by the software on the screen.
Step (3): Once the software is installed, open it and select Video option. Now select Compress option from here.
Step (4): A new menu will be opened from the left side and you have to select Xvid MPEG-4 Codec from here. This codec will be present in the compression list.
Step (5): Select Ok and then click on File and then Save as. The conversion process will be started. It will take some time to convert the video, but once the conversion is done you will get the video in same quality but in small size.
Thus, you can see how simple is to compress video files without losing quality using Virtual Dub free video capture/processing utility.
(5) Windows Movie Maker
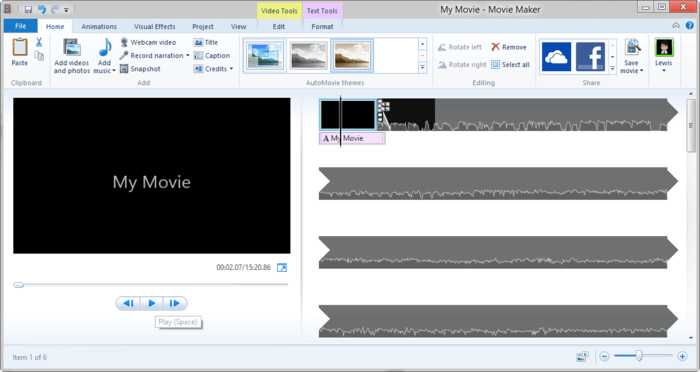
Undoubtedly, Windows Movie Maker is the best video compression software which makes to our guide of how to compress large video files without losing quality. The software is developed by Microsoft and is available for Windows operating system only.
If you are using Windows, Windows Movie Maker is the most appropriate software to compress video files without losing quality. Follow the steps shared below to convert your videos into small size using Windows Movie maker:
Step (1): Windows Movie Maker is installed on most of the computers. If it is not installed on your machine, download it from here and install it on your PC.
Step (2): Now open Start menu and then go to All Programs and select Windows Movie Maker to open it.
Step (3): Click on Import option and choose the video which you want to convert.
Step (4): Select the video which is highlighted in blue color and drop it on the timeline.
Step (5): Now click on File option and then choose Save Movie option. Click on My computer and then Next.
Step (6): Enter the name for the output video file and also select the location where you want to save it. Click on Next option.
Step (7): Now click on Show more choices and then go to Other settings. From here you have to select Video From broadband (512 kbps) as it will give you the best conversion possible.
Step (8): Click on Next button and conversion process will be started. Once the conversion is completed, click on the Finish button.
That’s it. You have successfully converted video into small size using Windows Movie Maker. I’ve also written a detailed tutorial about Windows 8.1 Movie Creator App, you can read from here.
Conclusion
In order to save some hard disk space on your computer, you can always resize videos without losing quality. We hope that our guide of how to compress large video files without losing quality has helped you.
Let us know using the comments section below – which video compression software did you used for compressing video files? According to you, which is the best software to compress video files without losing quality?
