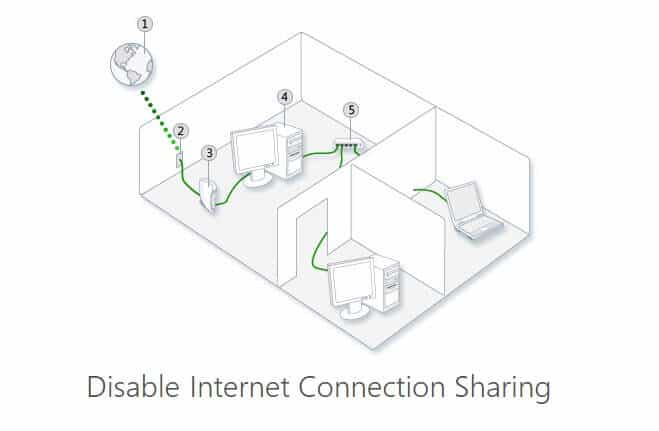
Internet Connection Sharing is the best way to enjoy one internet connection on several computers. Whether it’s WiFi connection or Wired internet connections, you can freely access one internet connection among multiple computers with the help of Internet Connection Sharing (ICS) or by using a router. Here’s – how to set up a shared Internet connection using ICS
Nowadays, internet connection sharing is one of the most needed and simple processes. Generally, most of the people share internet connection in order to access web on multiple devices.
If you have enabled Internet connection sharing (ICS) on your Windows PC to use same internet connection on all computers of your Home or Office, but now you want to use a router in the place of ICS or you don’t want to share your internet connection with anyone anymore then disabling internet connection sharing directly from your Windows PC is the most appropriate solution for you.
In today’s Windows guide, I will show – how you can easily turn off internet connection sharing on your Windows computers. Let’s follow the below mentioned instructions:
Related articles for you:
Disable Internet Connection Sharing in Windows PC
Disabling internet connection sharing (ICS) service in Windows operating system is superbly easy and it need only few simple clicks. Below explained step by step tutorial will smoothly work on almost all Windows versions. Here’s – how to disable internet connection sharing in Windows PC:
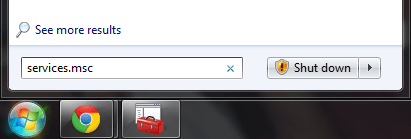
Step (1): First of all, click on Start button and type services.msc in the search box then press Enter.
Note: If you are using Windows XP operating system, firstly open Run command dialog box and type services.msc then press Enter button.
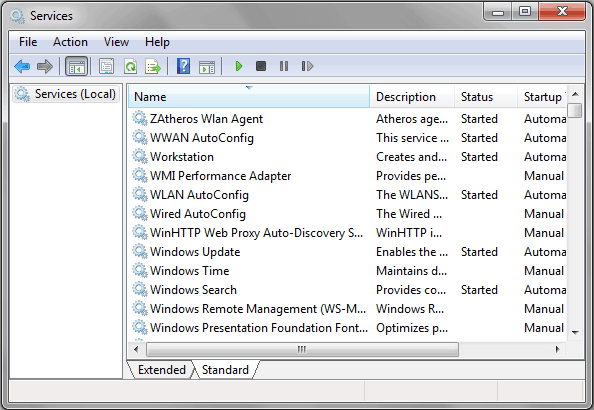
Step (2): After pressing Enter button, Windows Services window will appear.
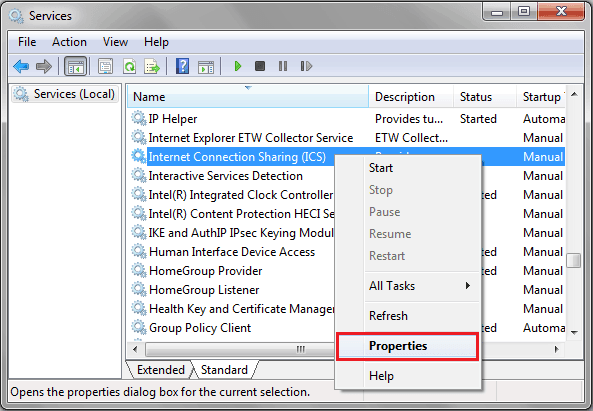
Step (3): In the Services window, scroll down and find “Internet Connection Sharing (ICS)” option. Once you got the Internet Connection Sharing (ICS) option, right-click on it and select Properties option.
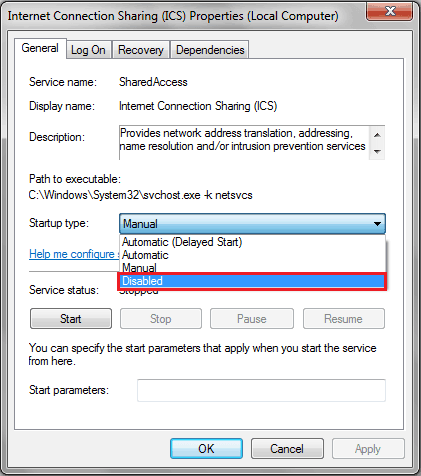
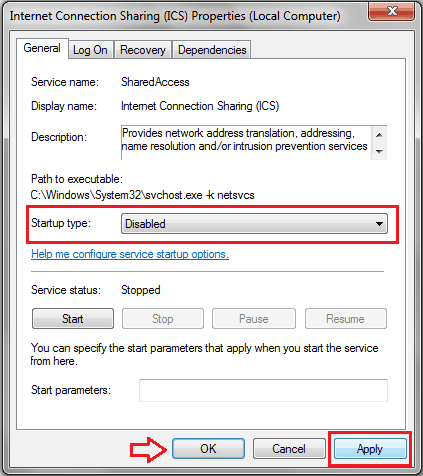
Step (4): Now from the Internet Connection Sharing (ICS) Properties dialog-box, go to Startup Type section and select the Disabled option from the drop down menu.
Step (5): After selecting Disabled option, click on Apply button and then press OK to save the changes.
Step (6): That’s it! Once you followed these steps correctly, the Internet Connection Sharing (ICS) will be disabled completely.
I hope, you found this step by step “Disable Internet Connection Sharing” tutorial useful for you. Feel free to ask and share your view with us through comments if you face any problem in order to disable internet connection sharing in Windows computers.
Read next: Web Timer – Track How Much Time You Spend on Internet
