Hiding files or folders in Windows 7 is one of the most simple and quick task but it may tense you if you don’t know the exact steps to hide a file or folder in Windows computer. Most of the people use Windows 7 operating system on their computer, that’s why i am sharing the file or folder hiding information for Windows 7 users.
Since, by hiding particular file or folder we can save our lots of valuable information, data from the untrusted people. So it’s very important to know – how you can hide a file or folder on your Windows 7 PC. Let’s see the step by step guide:
See also: 5 Free Photo Editing Software for Windows 8 / Windows 7
Instructions to Hide a File or Folder in Windows 7
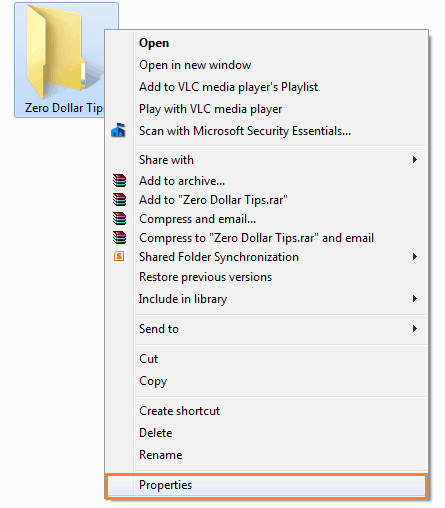
Step (1): At first, Right click on the file or folder you want to hide and then select Properties option.
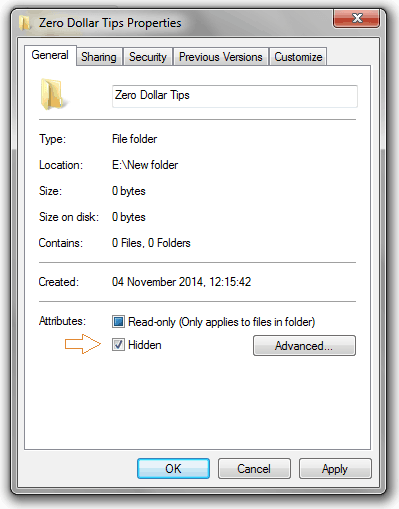
Step (2): After that, enable the Hidden option and click on Apply button to hide the file/folder then click on Ok.
Step (3): If the file or folder still appearing at the place from where you want to hide, then you will have to make few more simple changes.
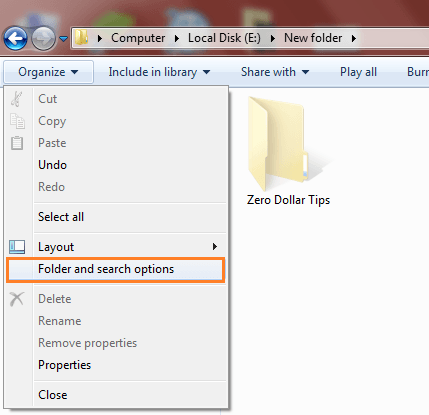
Step (4): To do so, open any folder you PC. Click on Organize button and then select the option of “Folder and search options” to move on Folder Options.
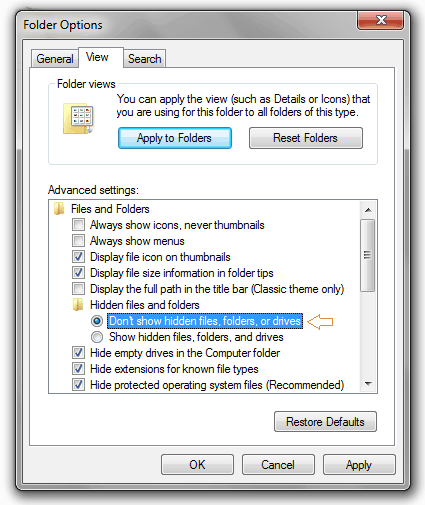
Step (5): Inside the Folder Options dialog-box, go to View tab and select the option of “Don’t show hidden files, folders, or drives” then click on Apply button.
You are done! Now go to that folder where your hidden file or folder were appearing, you will see all selected file has hidden. Thus, you can easily hide any file or folder in Windows 7.
How to Show Hidden Files in Windows 7
After hiding files, if you want to get those file back or want to show hidden files or folders in Windows 7 computer then you can do that by following few simple steps. Click here to read – How to Show Hidden Files or Folders in Windows 7.
Looking for some more interesting Windows 7 tips and tricks, how to guides, step by step tutorials then check out our popular section of Windows 7 tutorials.
