It might be a very painful situation for you if you know how to hide a file or folder in Windows 7 but don’t know how to show hidden files in Windows 7 system. For example: if you have hidden some very important files or folders to keep save from others because you don’t want any damage in those files. But when you needed to use those files or folders you forgot the exact way to show hidden files.
You may be in huge loss if you don’t know the quick way to unhide files or folders in windows. To solve your problem, in this guide we explained the simplest way to show hidden files or folders in Windows 7 computer. Let’s grab the step by step instructions:
See also: Windows 7 General Keyboard Shortcuts [Quick use]
How to Show Hidden Files in Windows 7
Step (1): At first, Right-click on the Windows 7 Start button (Windows Logo) and select the option of Open Windows Explore.
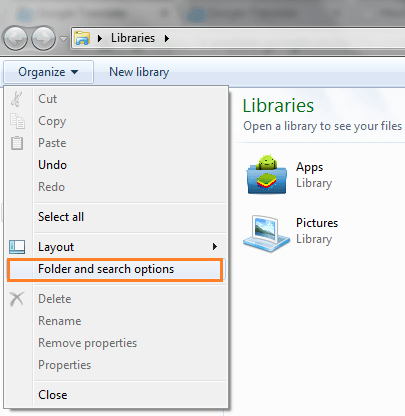
Step (2): After that, click on the Organize option and select “Folder and Search Options” to open the Folder Options.
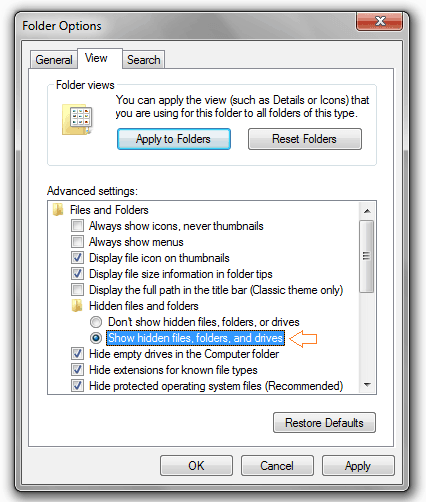
Step (3): On the Folder Options dialog-box, move to View tab and select the option of “Show hidden files, folders, and drives” then click on Apply button.
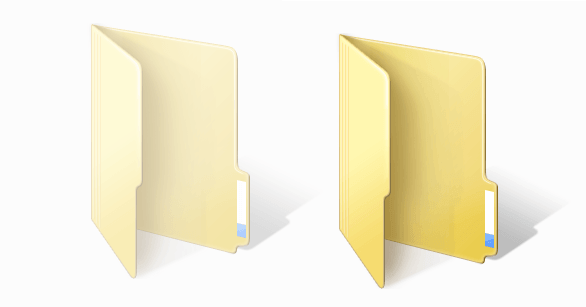
Step (4): Now you will see, the hidden files or folders has appeared in hazy color.
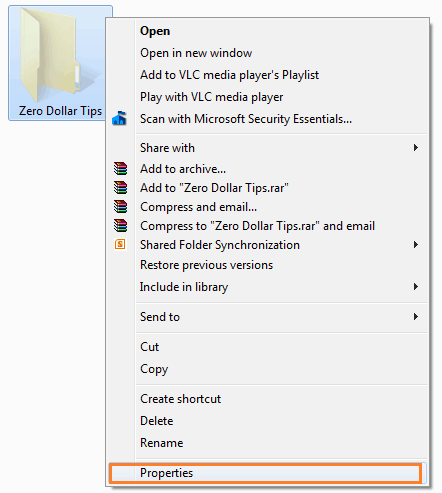
Step (5): To make them perfect, Right click on the file or folder and select Properties option.
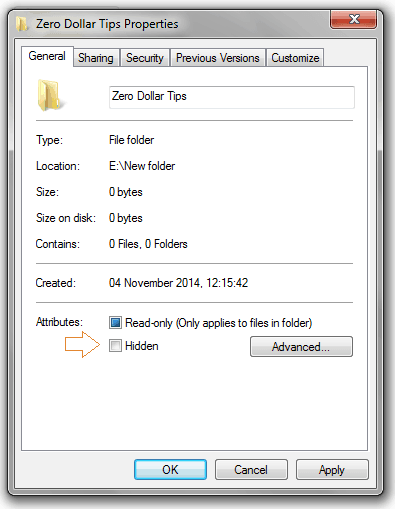
Step (6): After that, disable (uncheck) the Hidden option and click on Apply button to show hidden files or folder then click on Ok.
Congratulations! You have successfully got the hidden files or folders in your Windows 7 computer.
In case, you are still not familiar with How to Hide a File or Folder in Windows 7 then click here to read full guide……
Some more interesting Windows 7 tips and tricks, step by step tutorials, how to guides are available for you. If you want to check them all then feel free to visit our Windows 7 tutorials section.

