Are you looking for any exclusive CD burning software or DVD burning software to burn disc in Windows 7?
If “Yes” then please stop searching them. If you can easily burn a CD/DVD on your Windows 7 computer without using third party software then what’s the need to install any CD or DVD burning software.
You are still not familiar with it then you should know that Windows 7 operating system offers two different ways to burn discs using Windows Explorer. In this guide, we are going to show you – how you can burn a CD/DVD on windows 7 without using software. Here’s how:
See also: How to Know if Your Computer has a Virus
How to Burn Disc in Windows 7
Step (1): At first, insert a blank disc on your Windows 7 CD/DVD drive.
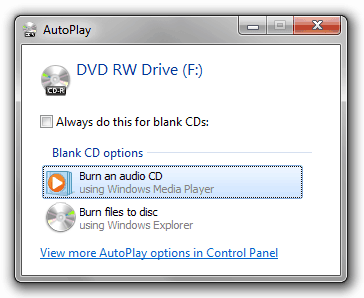
Step (2): After inserting the disc, an AutoPlay window will appear along with two options. Here you have to choose the option of “Burn files to disc“.
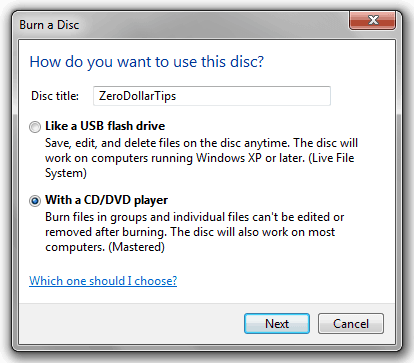
Step (3): After selecting the Burn files to disc option, another window will appear that asks you to choose a burning option from given two burning options “Like a USB flash drive” and “With a CD/DVD Player“.
The first option (Like a USB flash drive) offers the facility to save files like on a USB flash drive. So if you choose this option then you will be able to copy, paste, save, edit and delete files on the disc according to your wish. The only disadvantage with this option is that the burned disc through it will be not compatible with other players outside XP, Vista and Windows 7.
The second option (With a CD/DVD Player) allows you to burn files traditionally. So if you choose this option then the burned files will be read only files that mean, you can’t edit or remove those files once the disc is burned.
So, burning through the default option i.e. “With a CD/DVD Player” would be a good idea.
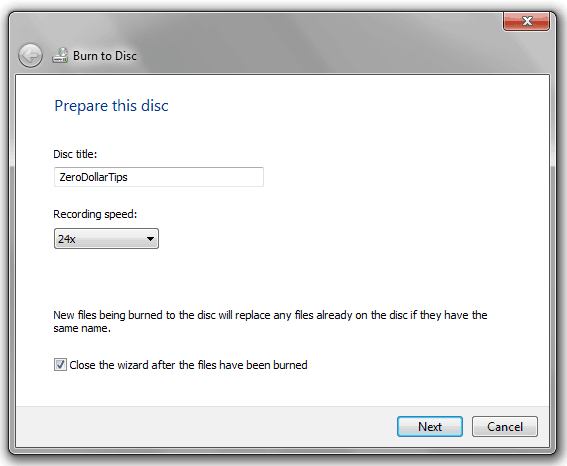
Step (4): In the given box next to Disc title, enter the title of your disc according to your wish and then click on next button.
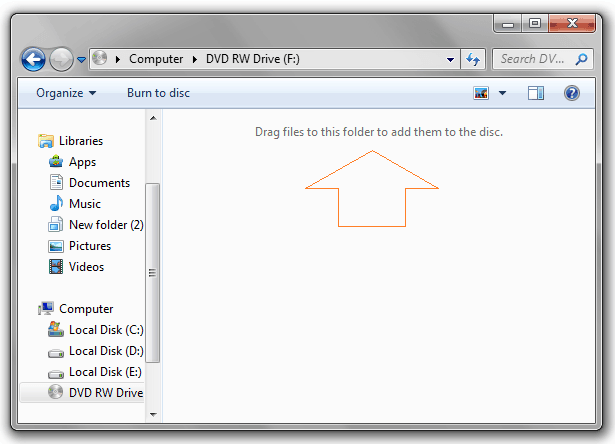
Step (5): After that you will see the drive on Explorer along with a label that indicates “Drag files to this folder to add them to the Disc.”
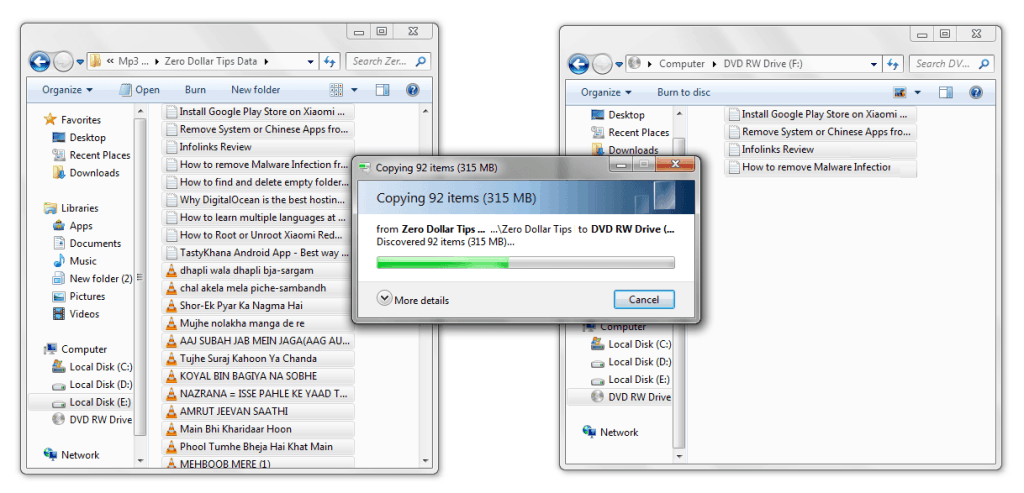
Step (6): So, now start dragging the files or folders which you wish to burn to the disc.
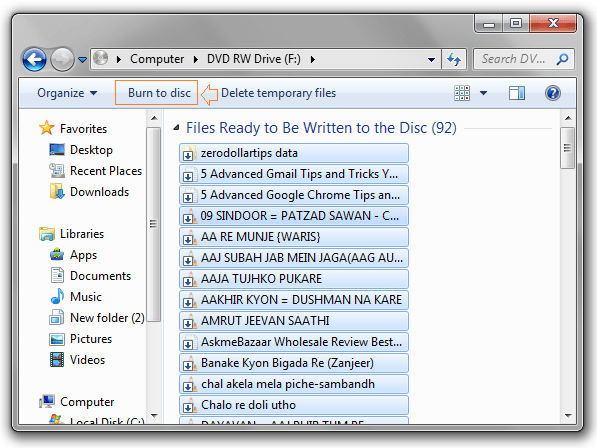
Step (7): When the dragging process completed, click on the button of “Burn to disc” as shown in below screenshot.
Step (8): On the new window, you may edit the title of your disc and adjust the recording speed (burning speed). Since, it selects the recording speed supported by your disc automatically. So there is no need to change. Click on the Next button to initiate the burning process.
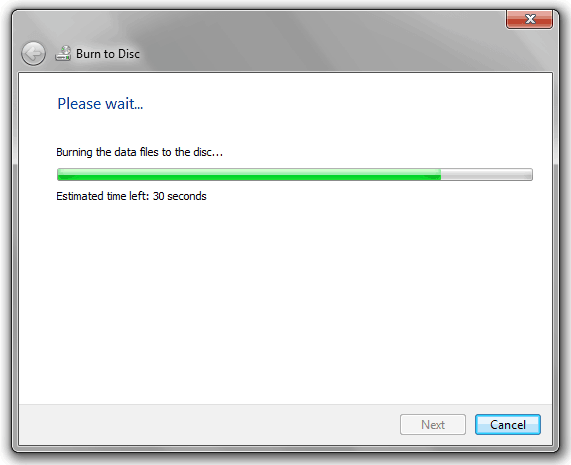
Step (9): As soon as the burning process begins, the progress bar will start showing you how much time is needed to complete the burning process.
Step (10): Once the burning process is completed, you are done!
Thus you can imagine, how much easy is to burn disc in windows 7. The most important and profitable thing with built in CD and DVD burning capabilities are you haven’t to install any third party software, just you have to do few simple media burning tasks to burn a CD/DVD on Windows 7 computer.
I hope you found this article useful for you. If you face any kind of problem in order to burn a CD/DVD on Windows 7 without using software (as shown above) then feel free to ask us through comments. We will be happy to help you 🙂
To get more interesting Windows 7 tips and tricks >>> click here……
