Maybe, you will feel strange after knowing that the integrated Webcam available on Windows computer can harm your privacy if you haven’t changed the default passwords or you do not turn off your Webcam when not in use. But yes, it’s true.
According to some popular technology news sites, a website streaming from thousands of IP cameras and spreading feeds over the web.
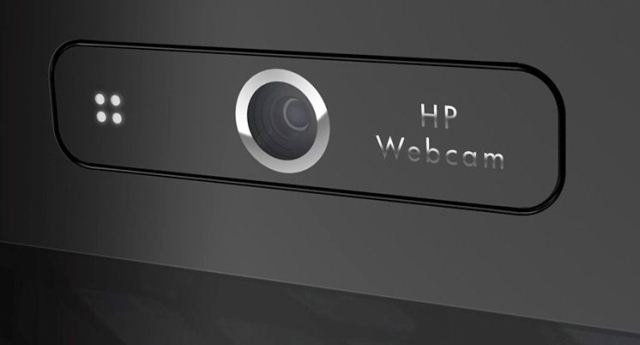
So, if you do care about your privacy and want to protect yourself from this kind of activity then disabling integrated Webcam in Windows PC is the best option. Here’s how to enable or disable integrated Webcam in Windows:
Important note: Below mentioned method works smoothly on all recent Windows operating system (Windows 7, Windows 8, Windows 8.1 and Windows 10)
See also: How to Enable or Disable SmartScreen on Windows 10
How to Disable Integrated Webcam in Windows
Step (1): At first, open the Device Manager. To do so, type Device Manager in the start menu search box and hit Enter.

Or, you can also launch the Device Manager by pressing Windows + R keys, and typing devmgmt.msc in the run dialog box and then pressing the Enter key.
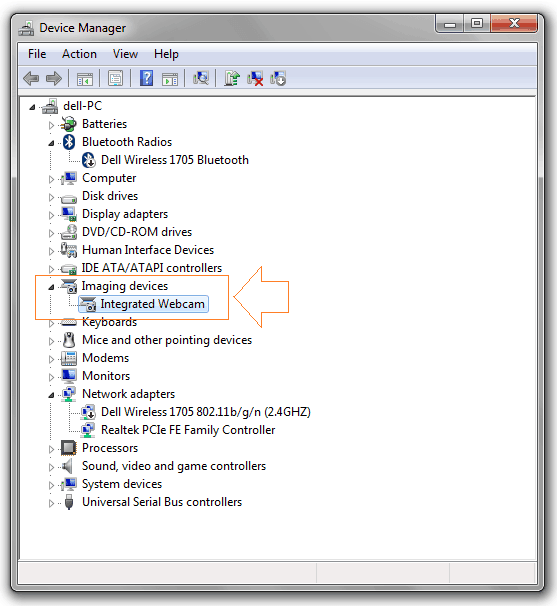
Step (2): On the Device Manager window, expand (double click) Imagining devices tree to see the built-in or Integrated Webcam option.
Sometimes, In the place of Integrated Webcam option might have the name of your PC’s manufacturer. So, there is no need to be worried.
Attention please: In case, you are using this method to disable an external USB webcam then the USB webcam entry will appear under “Universal serial bus controllers“. So to see the entry, expand the option of Universal serial bus controllers.
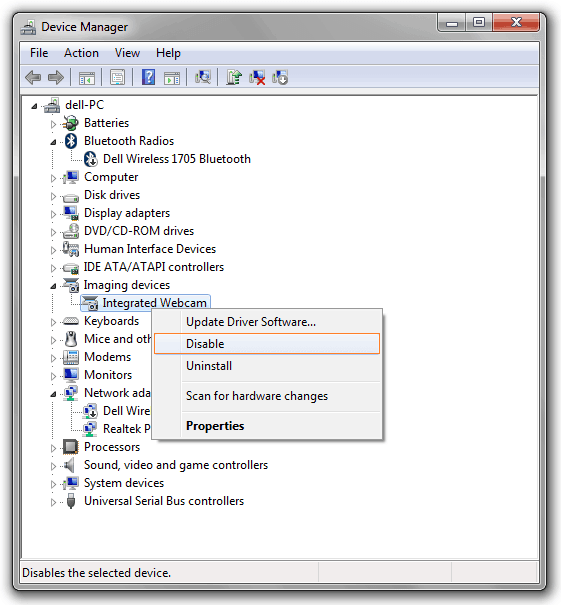
Step (3): Now right click on the Integrated Webcam option and from the options select Disable option.
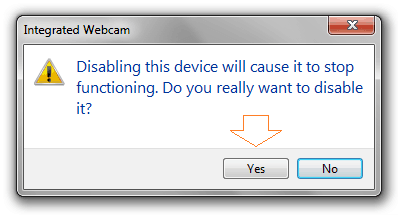
Step (4): After the click, a confirmation window will appear so click on “Yes” button.
You are done! Your PC’s integrated Webcam has disabled successfully.
Read also: How to Disable Windows 10 Lock Screen
How to Enable Integrated Webcam in Windows
If you have already disabled the integrated Webcam on your Windows PC and want to enable then you can do so by the same way.
Step (1): Firstly, open the Device Manager as mentioned in above steps.
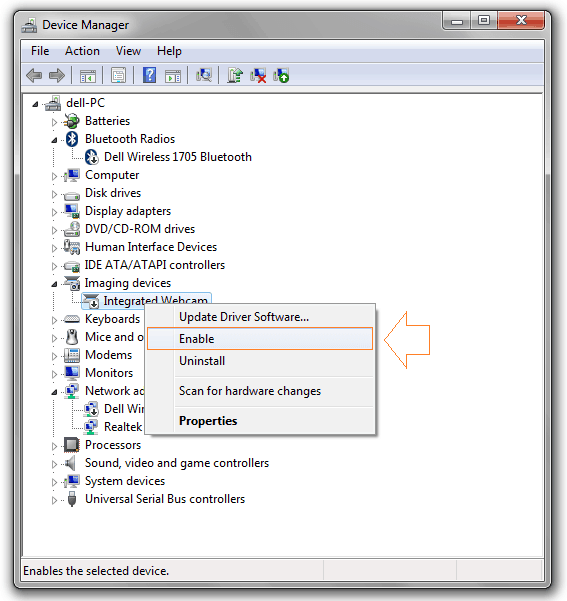
Step (2): After that expand Imaging devices tree to move on Integrated Webcam option. Now right-click on the Integrated Webcam and from the options select the option of Enable.
Step (3): Again, a confirmation window will appear so click on “Yes” button.
That’s it! Now the integrated Webcam of your Windows PC has enabled successfully. Start using according to your need.
To get more Windows tips and tricks >>> click here……………

