If you want to turn on or off SmartScreen settings on Windows 10, here’s a complete tutorial on how to Enable or Disable SmartScreen on Windows 10 PC.
Are you a Windows user? If you have installed the latest Windows 10 operating system on your computer then you may notice that the Windows SmartScreen feature is available without any changes. Windows SmartScreen is one of the most protective tools (security tool) on Windows 10 that helps to run computer smoothly.
When you use the internet on your Windows PC, several websites or web pages try to install their default apps and codes automatically (silently).
Some of those apps and codes can harm your computer much badly. But if you know the use of Windows SmartScreen then you could readily prevent these apps from being installed on your PC without your permission.

Enabling SmartScreen on Windows 10 system will turn on the feature of asking you before the installation of a new app. And thus, you will be able to select whether you want to run any particular app or not.
Today in this Windows 10 guide, we are going to explain – how you can enable or disable SmartScreen on Windows 10 computer. See the below-mentioned step by step instructions carefully:
Turn ON or OFF SmartScreen Settings on Windows 10
Step (1): At first, go to Start Menu and click on Control Panel.
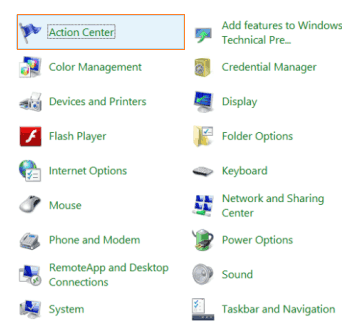
Step (2): From the Control Panel options, select the option of Action Center.
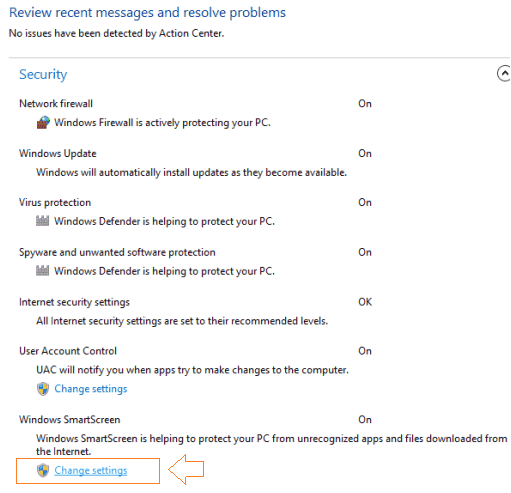
Step (3): On Action Center page, click on Security option to expand it.
Step (4): Under the Security section, find the option of Windows SmartScreen and click on Change Settings link.
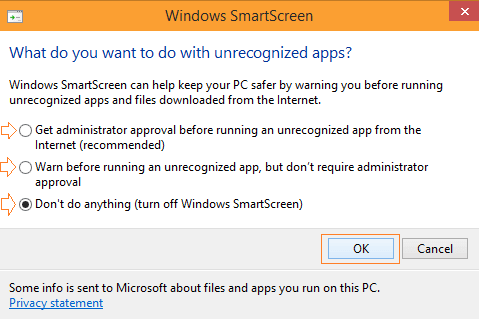
Step (5): Just after the click, a dialog box will appear with three options as shown in below screenshot.
Step (6): If you want to Enable Windows SmartScreen then select the first option that is “Get administrator approval before running an unrecognized app from the Internet (recommended)” and then press OK button.
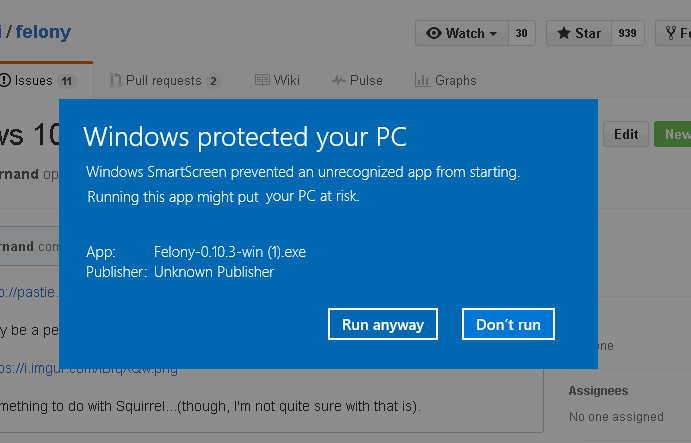
Step (7): If you want to get notified (as shown in the first screenshot of this article) before an installing any unrecognized app on your PC then select the second option that is “Warn before running an unrecognized app, but don’t require administrator approval” and then press OK button.
Step (8): If Windows SmartScreen is already enabled on your PC and you want to Disable Windows SmartScreen on Windows 10 then select the third option that is “Don’t do anything (turn off Windows SmartScreen)” and then press OK button.
Thus, you can change Windows smartscreen settings on Windows 10 PC. Feel free to ask us through comments if you face any problem in order to enable or disable SmartScreen on you Windows 10 computer.
Check out these more helpful Windows 10 tutorials:
- How to Enable or Disable SuperFetch in Windows 10 / 8 / 7
- How to Enable USB Selective Suspend in Windows 10
- How to Enable or Disable Fast User Switching in Windows 10


I cannot even find the SmartScreen on Windows 10; moving the Sideload to Developer did nothing because the original application file will only download partial and the image file that I have prompts a FAIL download status. Any other options? I need to load this statistical software!