Are you using any user account management tool to manage users in Windows? If not, you must use “Quick User Manager” to manage users in Windows operating system.
Although, on Windows computer you can manage several things from User Accounts menu which is available under the Control Panel such as: create a new User Account, change User Account name, change User Account type, add or remove users accounts, and manage another accounts etc.
But you will feel helpless when it comes to perform some quick actions related to managing users in Windows like adding multiple users at once, deactivating accounts, changing user benefits, and many other things too. In this condition, using a powerful user account manager tool like Quick User Manager is the best option.
In this Windows help guide, we will explain – how to manage users in Windows 8 or Windows 7 computers using Quick User Manager software.
See also: MiniTool Partition Wizard 9: Free Partition Manager for Window PC
Manage Users in Windows using Quick User Manager
Quick User Manager is a free software for Windows that offers you the multiple user account management options in a simple interface.
The most interesting thing of this portable tool is, it doesn’t need installation. Only you have to download Quick User Manager for free and start enjoying its exclusive features.
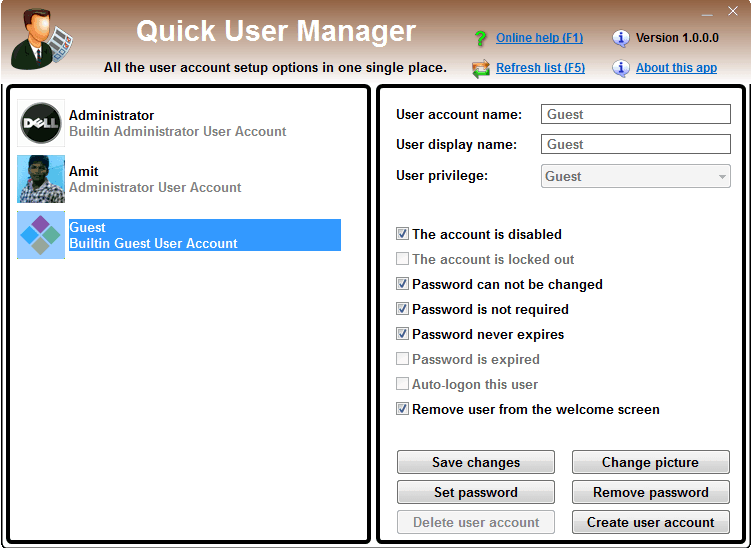
This free portable software helps you to change user account settings like create, disable, enable the users account, clear the lockout state, auto-logon a user, and remove user accounts from the Windows welcome screen etc.
Read also: How to Create 4 Digit PIN Logon in Windows 10
To manage the user account, from the left section of freeware click on the account which you want to modify. Just after the click, you will be able to see the complete list of Windows account managing options in the right panel such as:
- User account name
- User display name
- User privilege
- The account is disabled
- The account is locked
- Password can not be changed
- Password is required
- Password never expires.
- password is expired
- Auto logon this user
- Remove user from the welcome screen
You can make these changes, just by clicking the check boxes available next to the options. Once you are done, click on Save changes button and then confirm “yes” to apply these accounts settings.
Read also: How to Change Account Password on Mac OS X
Quick user manager also included several user account setup options on the main page to quick access:
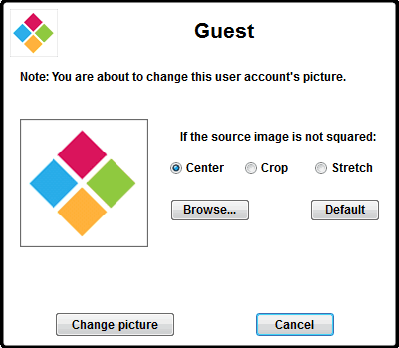
# Change picture: To change the user account picture, click on “Change picture” option. Just after the click, a pop up will appear from where you can browse your favourite picture and set as user account’s picture.
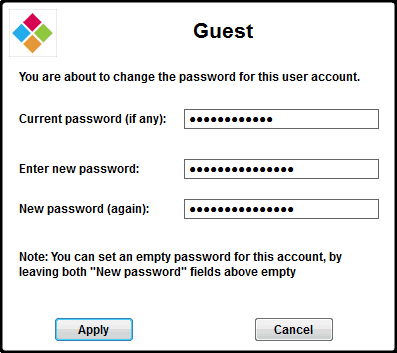
# Set password: You can easily set or change the password by clicking on “Set password” option. After click, a box will appear where you have to enter your current password and new password (twice) then click on apply button.
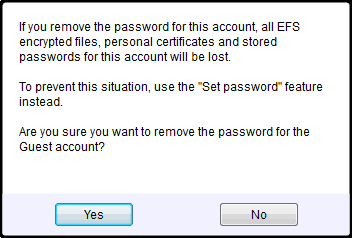
# Remove password: In case you want to remove the user account password, click on “Remove password” option and then confirm the pop up window.
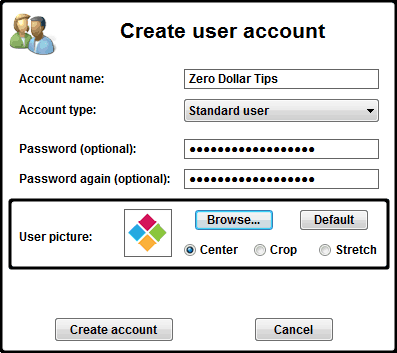
# Create user account: To create new user account, click on “Create user account” and then enter required information on pop up box like account name, account type, password, use a picture and then press create account button.
Download Quick User Manager
Quick user manager is one of the most appropriate software for you if you want to manage your user accounts very easily and quickly on your Windows PC. Download link is given below:
Get from here → Download Quick User Manager
Feel free to share your view with through comments, your comments will be always appreciated here. Do you think – Quick User Manager is the best way to manage users in Windows 8 and Windows 7 computers?
Hi Amit,
Informative post. This is really a cool guide to manage user windows.
Thanks for sharing this post 🙂
Hey Kuldeep,
I am happy to know, you loved this guide of Quick User Manager to Manage Users in Windows 8 and Windows 7 operating system. thank you so much for sharing your valuable comment with us. Keep coming and sharing your views 🙂