How to automatically shutdown computer, Windows 7 automatic shutdown !!
If you are one of those Windows users who have a habit of working late nights, then it’s quite possible that sometimes you forget to shutdown your computer after use. To get rid from this problem, you can use auto shutdown feature on Windows computers.
In Windows operating system, it’s very simple to configure your PC to shutdown automatically at a scheduled time (when you’re not using it) using task scheduler. After setting up your Windows computer to automatic shutdown, you no need to worry about the turning off your computer properly before leaving the computer desk.

But one thing you need to keep in your mind that the auto shutdown Windows feature will work only when your computer becomes idle. Here’s the step by step Windows guide on – how to automatically shutdown Windows 7 PC at night.
See also: How to Change Windows Startup Sound in Windows 7
Windows 7 Automatic Shutdown
Below mentioned tutorial of automatically Shutting down Windows computers will also work on other versions of Windows . This guide is executed on Windows 7 operating system:
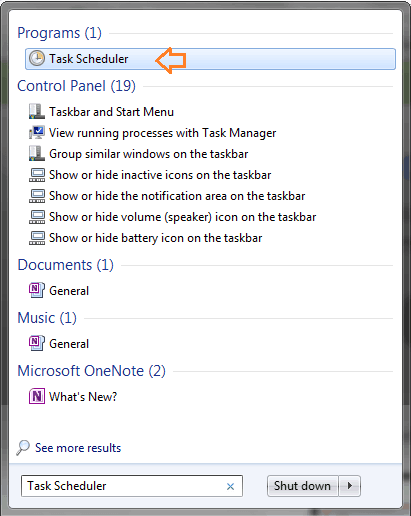
Step (1): To automatically shutdown Windows 7 PC at night, first of all press the Start button and search for “Task Scheduler” then click on Task Scheduler to open.
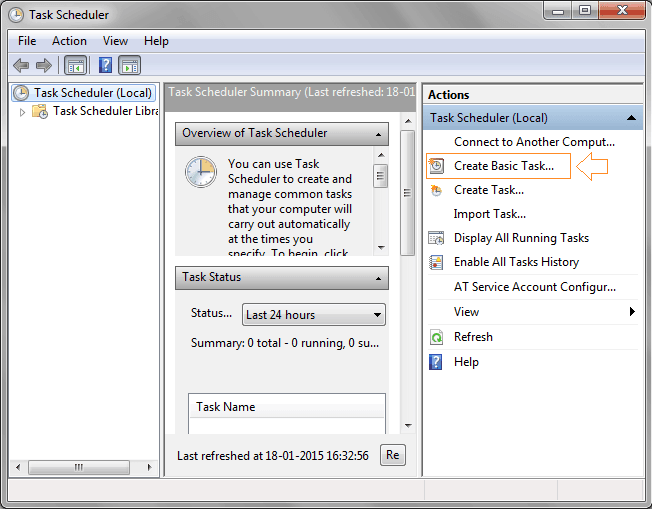
Step (2): On the Task Scheduler, from the right side “Actions” panel click on “Create Basic Task” option.
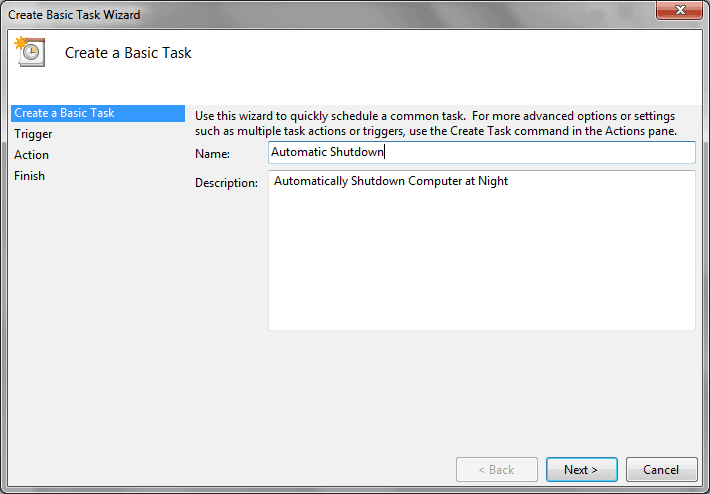
Step (3): After that enter Name and Description of the task according to your wish and then click on Next button.
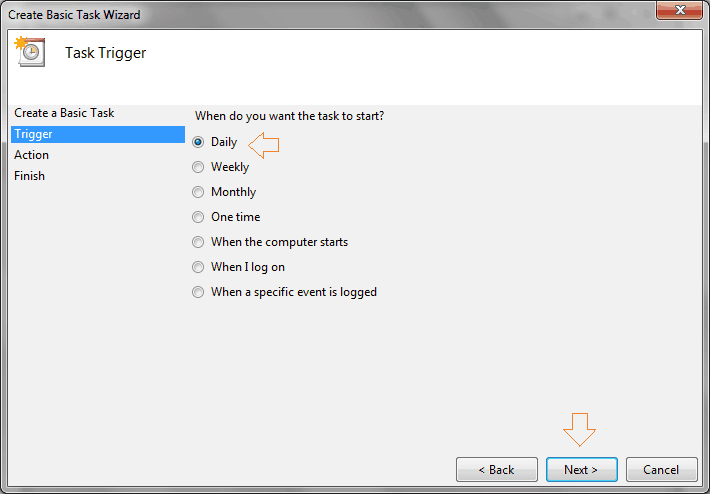
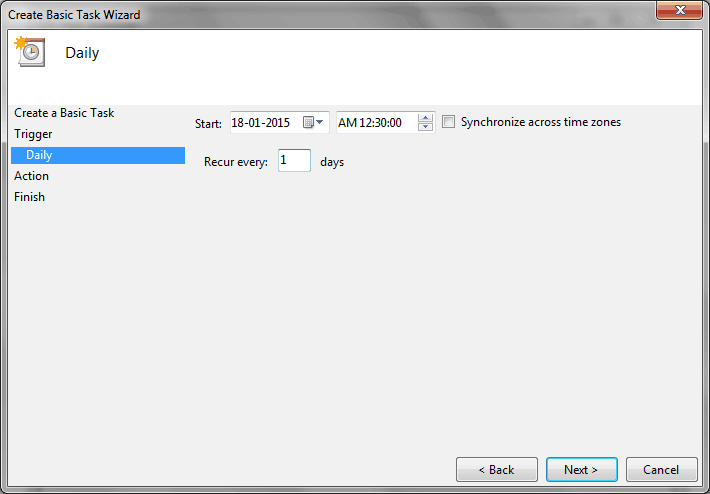
Step (4): On next screen, select “Daily” option and then click on Next button to continue.
Step (5): Now enter the starting Date and Time. Also, make sure that 1 day is selected in the Recur every section and then click on Next button.
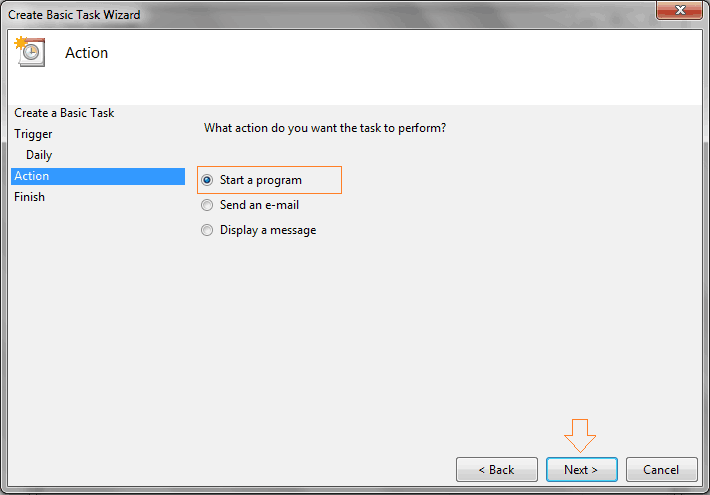
Step (6): After that select “Start a program” option and then click on the “Next” button to continue.
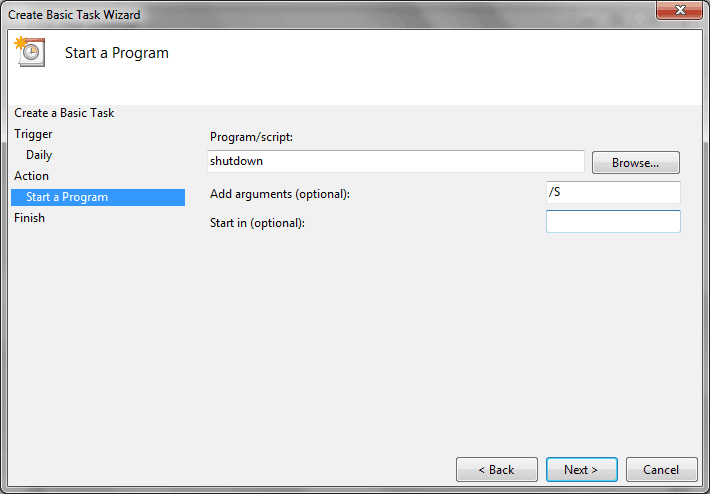
Step (7): On the program/script field enter “shutdown” and inside Add arguments section enter /S then click on Next button to proceed. Even, you can also enter /F as the second argument which will force the Windows computer to shutdown.
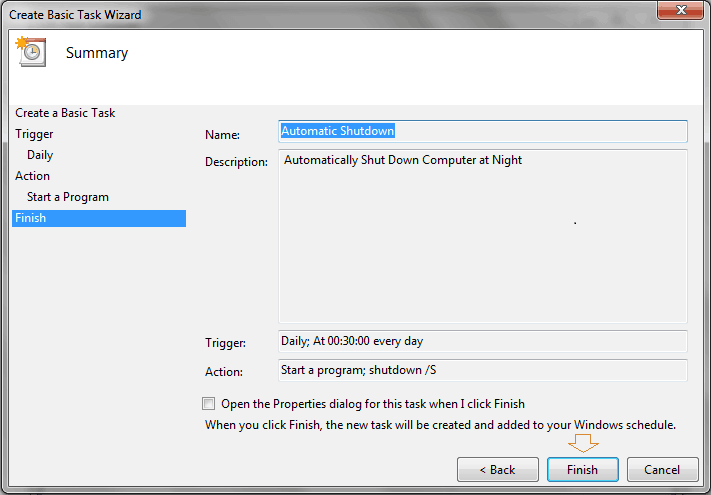
Step (8): Once the configuration is completed, you will see the summary to check everything is entered properly. Now click on “Finish” button.
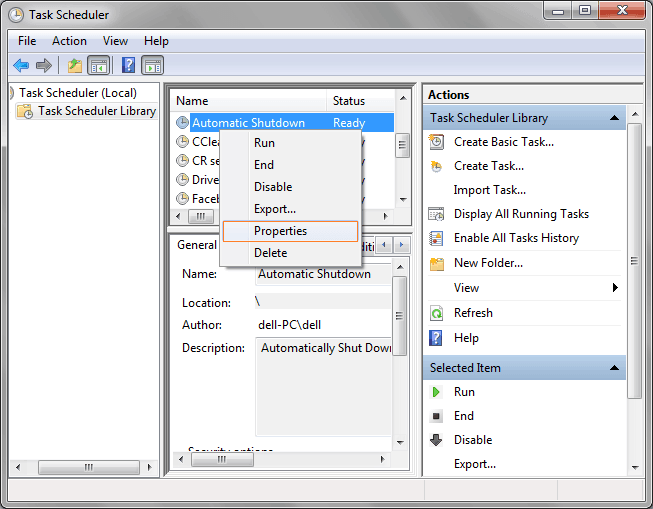
Step (9): Now from the main window, find the automatic shutdown task you just created. Right-click on the task and select the “Properties” option.
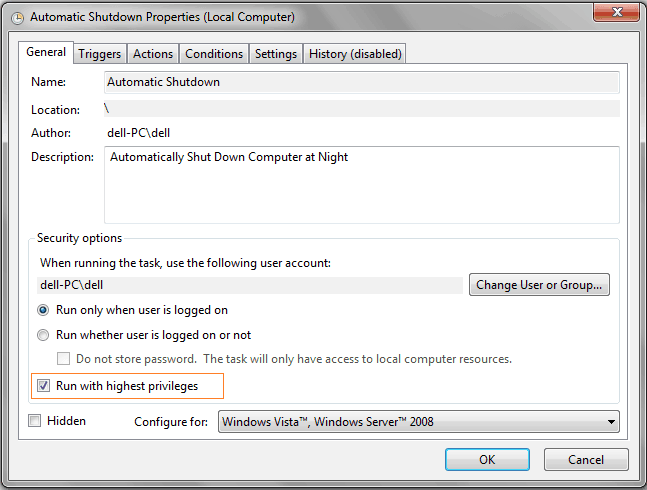
Step (10): Just after clicking on Properties option, task properties window will appear. On the “General” tab, select the checkbox “Run with highest privileges” option.
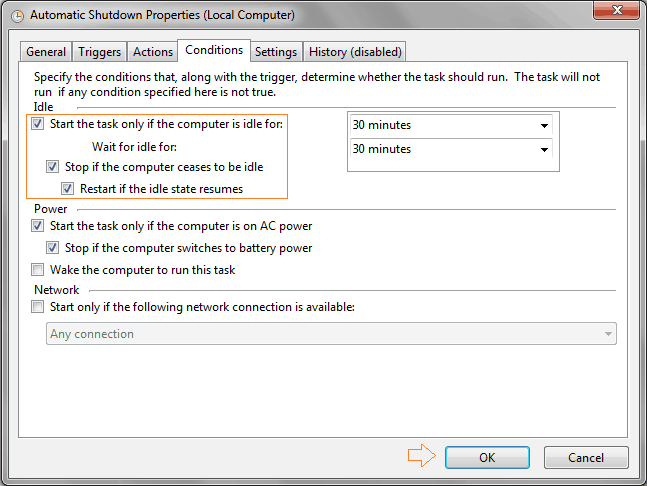
Step (11): Now move to “Conditions” tab and select all three check boxes (Start the task only if the computer is idle for, Stop if the computer ceases to be idle, and Restart if the idle state resumes) from the Idle section. Also, select the time for these both fields according to your wish. For example: we selected “30 minutes” in both the fields.
Step (12): After that go to “Settings” tab and select the check boxes “Run task as soon as possible after a scheduled start is missed” and “If the task fails, start every”. Enter the time and the number of attempts according to your wish. Also, change the time of check box “Stop the task if it runs longer than”. For example a screenshot is shown below:
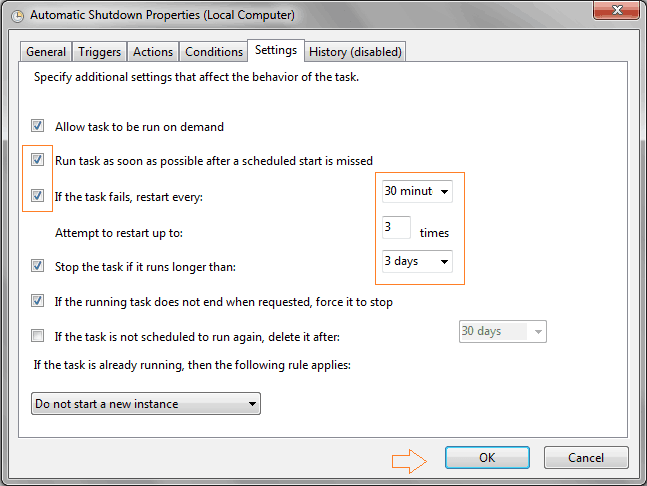
Step (13): Finally, click on “Ok” button to save the changes you made. That’s it !
You have successfully configured to automatically shutdown Windows 7 PC at Night. Now, you will have not to worry for shutting down your computer while working late nights.
If you have any other quick ways of Windows 7 automatic shutdown then feel free to share your view with us via comments.
Read next: A simple way to Schedule Your Mac to Start Up or Shut Down
