Can’t change Windows 10 screen resolution because of display settings grayed and stuck? Here’s how to fix can’t change screen resolution in Windows 10 PC.
If you want to have a really significant display experience then it’s very important to adjust or change screen resolution in Windows 10 PC.
Having the correct Windows 10 screen resolution settings helps you in getting the better display of content and the top notch clarity of images.
Because all of us know, the higher is the screen resolution, the more number of pixels are displayed on the computer screen and as a result, the images and contents are sharper and more detailed.
In Windows 10, the process of adjusting or changing screen resolution is extremely simple. Only you have to right-click on your computer screen and select “Display Settings” option and then from the “Resolution” section, select the resolution you want for your Windows 10 computer screen. It’s that simple!
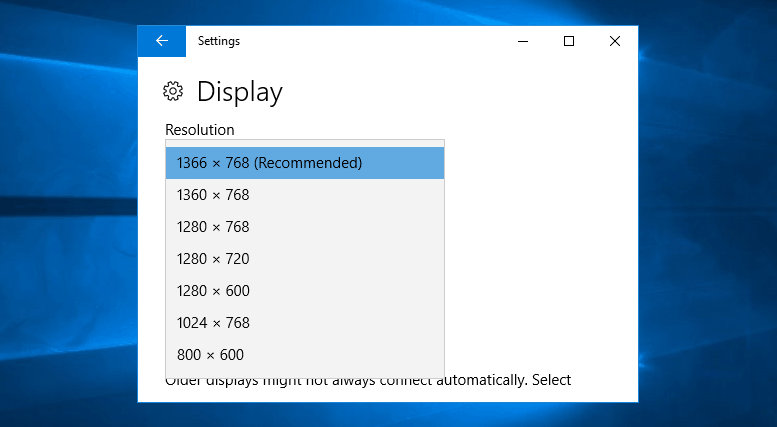
But after the Windows 10 upgrade, many Windows users have reported that they are unable to change Windows 10 screen resolution. They can’t change screen resolution in Windows 10 because the computer screen gets stuck at the default resolution and the display settings grayed out and cannot be modified in any situation.
Now there could be multiple reasons that Windows 10 can’t change screen resolution but the main problem due to which you can’t change resolution in Windows 10 is the wrong or corrupt drivers.
If you are also one of them who can’t change their screen resolution on Windows 10 PC then this guide is a perfect fit for you because here we are going to share four different methods to fix cannot change screen resolution in Windows 10 issue.
How to Fix Windows 10 Can’t Change Screen Resolution
Why can’t I change my resolution on Windows 10? No doubt, this is a very annoying situation for anyone who just upgraded their system to Windows 10 and now he/she is unable to change Windows 10 screen resolution.
After facing this annoying Windows 10 error, if you are thinking to rollback your Windows 10 upgrade to the previous version then please hold on a second. The good news is, you don’t need to do that because we have found some amazing solutions to fix can’t change screen resolution in Windows 10 operating stream.
You can follow different methods to fix Windows 10 can’t change screen resolution issue. Here, we have listed all the possible solutions to solve can’t adjust screen resolution Windows 10 PC:
Method 1: Check for Updates in Windows 10
Make sure that your Windows 10 computer is having the latest Windows updates installed. To verify the same, you can follow these steps which we have mentioned below:
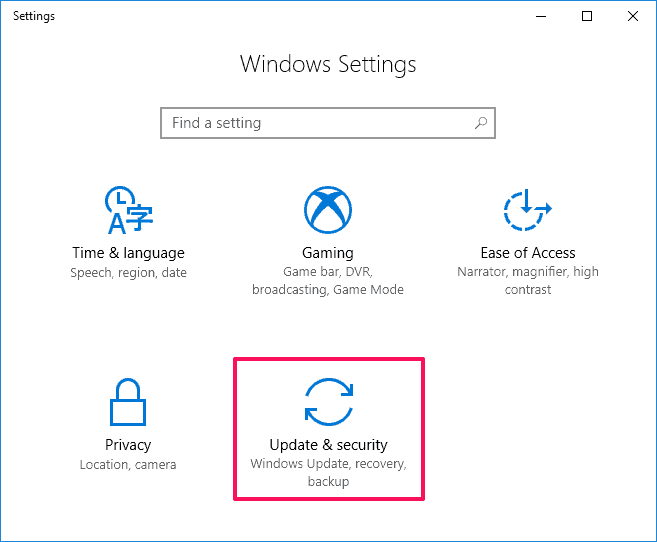
Step (1): First of all, press the combination of Windows + I keys together to open the Windows Settings and then select Update & Security option.
Step (2): On the Update & Security window, select Windows Update and then click on Check for updates button.
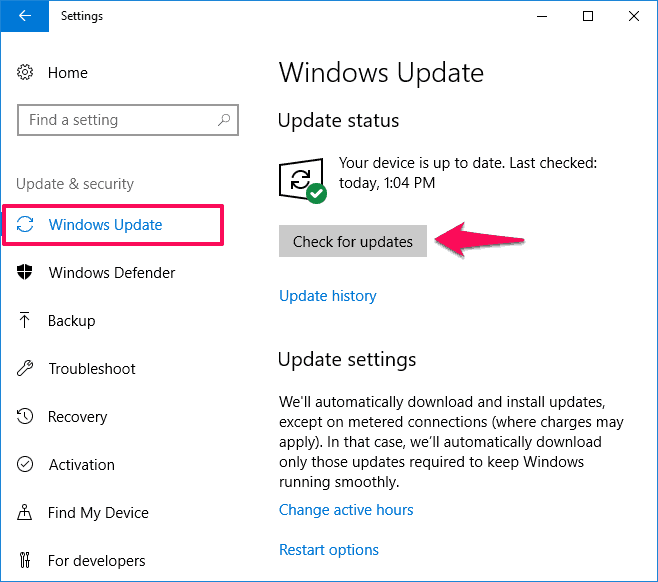
Just after the click, Windows will start searching for the updates available for your Windows 10 computer.
The updates will get downloaded and installed automatically. Once the update installation is completed, simply restart your Windows 10 computer.
Installing the available Windows 10 Updates will help you in fixing can’t change resolution Windows 10 problems. It is also possible that the Display drivers of your system are outdated. To update them, you can follow the next method.
Method 2: Update Display Drivers in Windows 10
We all know that our systems come with a graphics card which is responsible for proper functioning of the display. You have to make sure that the display drivers are updated to the latest version available.
Follow the below-mentioned steps to find out how to update display drivers in Windows 10 computers:
Step (1): At first, open Run dialog box by pressing the Windows + R keys together and then enter devmgmt.msc in it to open the Device Manager.

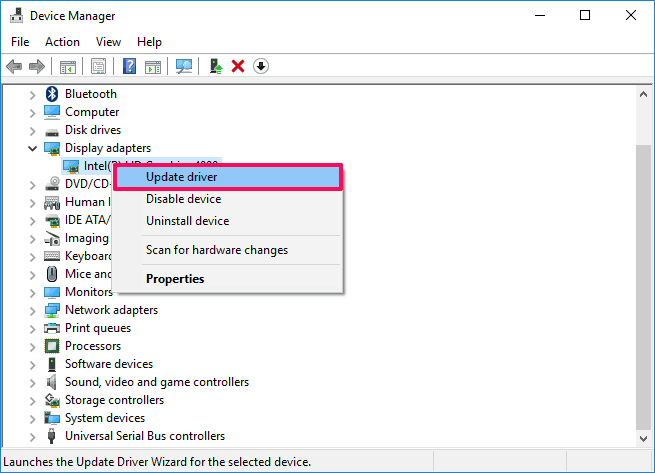
Step (2): On the Device Manager window, expand the Display Adapters option and right click on the graphic card which is installed on your device and then select “Update Driver” option.
Step (3): In the next window, select “Search automatically for updated driver software” option.
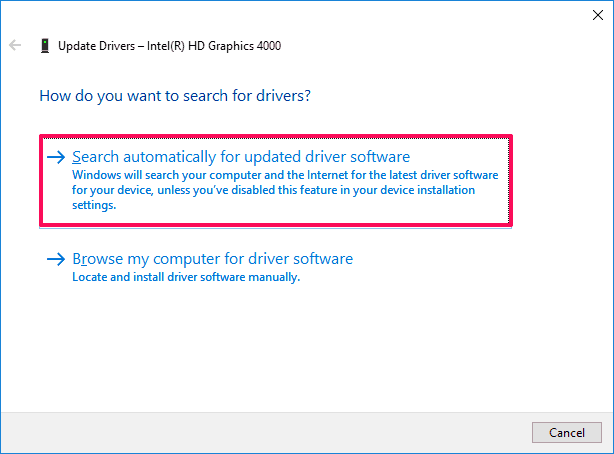
Now, Windows will search your computer and the internet for the latest driver software for your device and will install it on your system. With this action, display drivers should be updated on your computer.
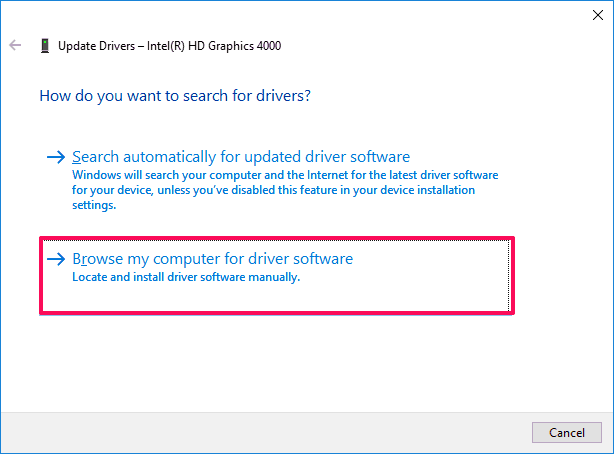
Step (4): However, if you are still not able to update the graphics drivers then you can repeat step 2 and this time select “Browse my computer for driver software” option.
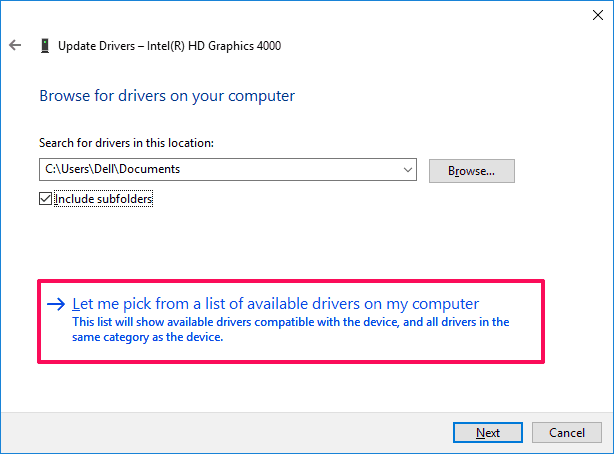
Step (5): Now you will be asked to browse for drivers on your computer, here you have to select “Let me pick from a list of device drivers on my computer” option.
Step (6): Next, it will ask you to Select the device driver you want to install for this hardware. So, just select the drivers which are compatible with your Graphics card and click on Next button.
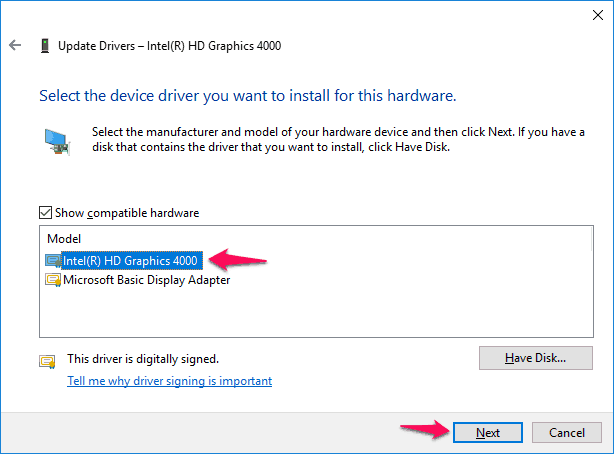
Step (7): Now the driver installation process will begin. Wait till it gets completed.
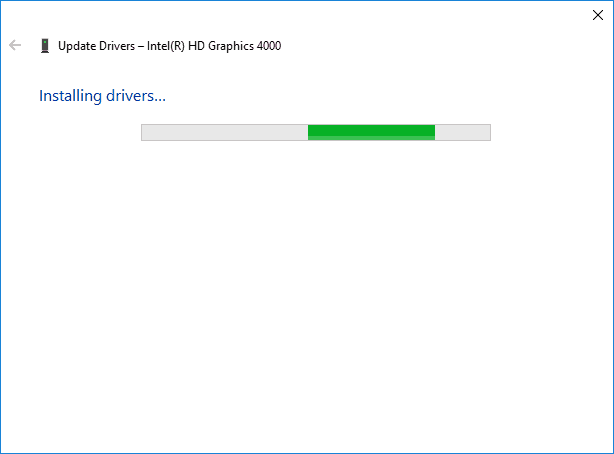
Once the Windows 10 display driver is installed successfully, restart your computer for changes to take effect.
This method should help you in resolving can’t change Windows 10 screen resolution issues. If you are still facing the screen resolution stuck in Windows 10 issue, you can move over to the next solution.
Method 3: Update Graphics Card Driver Manually
All the above methods to fix can’t change resolution Windows 10 issue include automatic updating of drivers. If you are not able to automatically update the display drivers, you can update them manually.
Updating Graphics Card driver manually by downloading from the manufacturer’s website is a pretty simple task. Follow the below-mentioned instructions to update graphics card driver manually in Windows 10 PC.
Before downloading the Graphics Card driver, you need to know which mode of Graphics card you are having installed on your system so that you can download from the manufacturer’s website. Don’t worry, it can be easily find using the DirectX Diagnostic Tool. Here’s how:
Step (1): At first, open Run dialog box by pressing Windows + R keys together and then type dxdiag and hit Enter button.
Step (2): On the DirectX Diagnostic Tool, go to Display tab and then find out all the details about your graphic card.
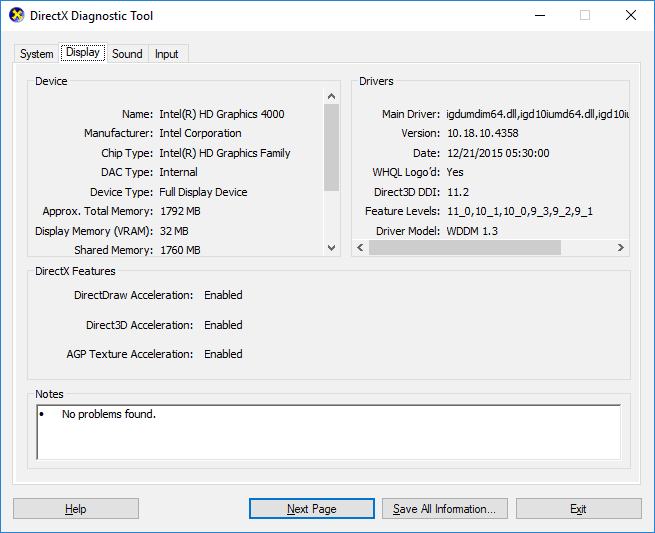
Now that you know the Graphics card model name and all other details, you can easily download the latest drivers.
Step (3): Go to the manufacturer’s website and download the Graphics Driver for Windows 10 computer.
Step (4): Once the Graphics Drivers are downloaded, simply install them on your Windows 10 computer by following on screen instructions.
Step (5): After the installation, restart your Windows 10 PC for changes to take effect.
Hopefully, Windows 10 screen resolution problem should be fixed. Now, you should be easily able to change screen resolution on your Windows 10 computer.
Conclusion
According to most of the Windows 10 users, out-dated display drivers are the main culprit of Windows 10 can’t change screen resolution issue. So, your first priority should be to install the latest versions of graphics driver for Windows 10 computers.
We hope that now you are able to easily change Windows 10 screen resolution after following the above-explained methods.
If you are still facing any problems regarding Screen Resolution, Color calibration, ClearType Text, Display Adapter, Text sizing, or any other Display settings in Windows 10 PC then feel free to let us know using the comments section below.
Also, share with us if you know any other way to fix can’t change screen resolution in Windows 10 issue.
Do you know? What to Do if Windows 10 Crashes My Computer Constantly?