Do you know – Why to Create a USB Recovery Drive? and, How to Create a USB Recovery Drive in Windows?
Basically, USB recovery drive is the recovery image of your computer which is stored in a USB flash drive. You can use the USB recovery drive to troubleshoot and fix the problems of your computer when required.
Creating a USB recovery drive on Windows computers is not a very tough task, but if you are not familiar with the exact procedure of particular operating system then it might be a quite tough task for you.
If you are using Windows 8.1 computer then you will have not to do lots of hard work for creating a recovery drive, because the Microsoft has included a built-in tool to create a USB recovery drive in Windows 8.1 operating system. Here’s the step by step guide:
Important note: Creating a recovery drive will erase all the files or folders already stored on your USB flash drive, so please use an empty USB flash drive. Since, Windows will inform you that how big the recovery partition is. So, you need to have a USB flash drive of larger storage capacity (recommended size 16 GB).
Create a USB Recovery Drive in Windows 8.1
Step (1): First of all, click on the Windows icon from the Windows 8.1 taskbar.
Step (2): Now from the top right side of your computer screen, click on the Search icon to open the search box.
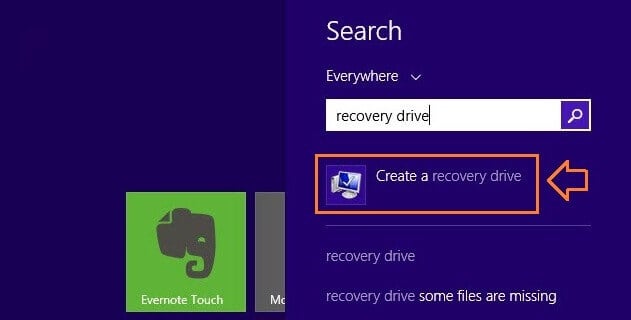
Step (3): Inside the search box, type “recovery drive” and from the search result click on “Create a recovery drive” option.
Step (4): Just after the click, User Account Control pop up will appear. Click on “Yes“.
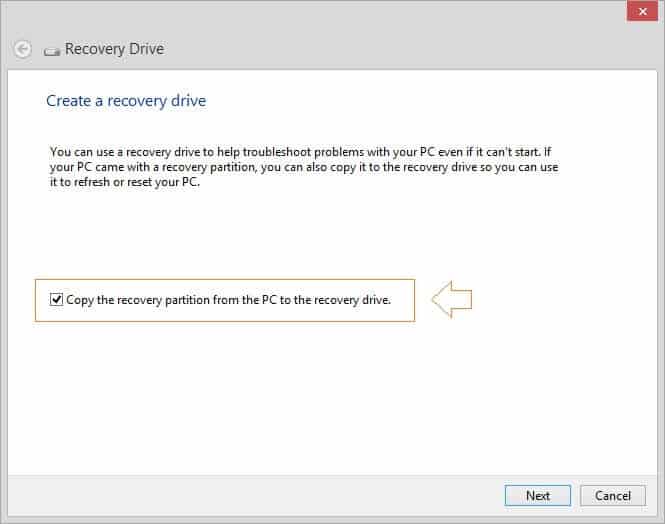
Step (5): After that, the “Create a recovery drive” window will appear. Here, you need to make sure that the option of “Copy the recovery partition from the PC to the recovery drive” box is checked and then click on “Next” button.
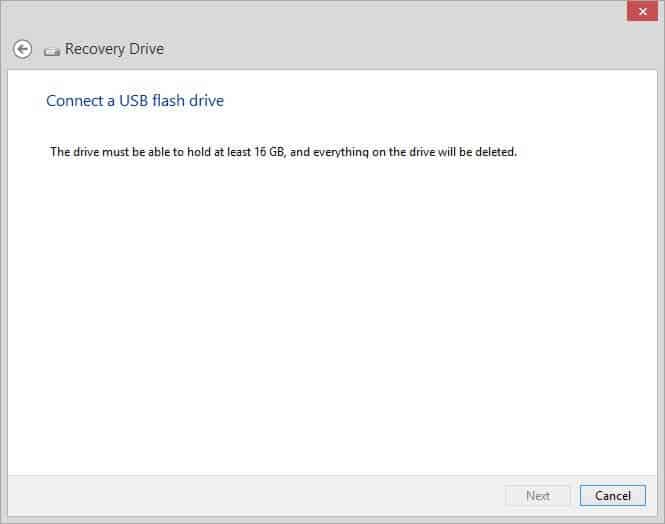
Step (6): Now “Connect a USB flash drive” window will appear to indicate – how much space you should have on your USB flash drive.
For example: here we are using a 16GB USB pen drive to create USB recovery drive in Windows 8.1 PC.
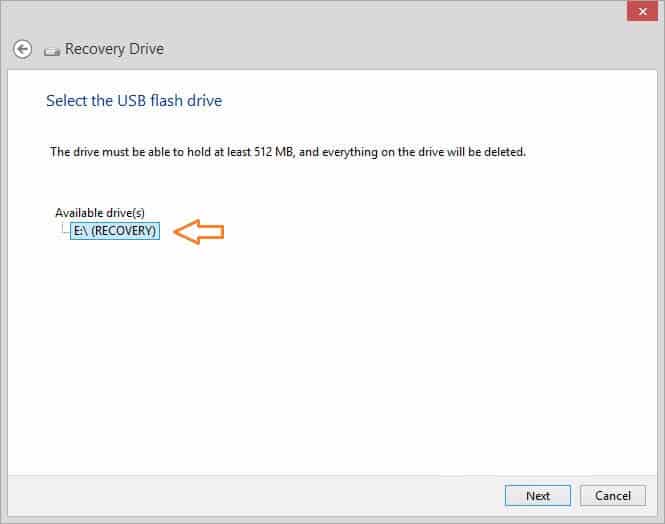
Step (7): So, insert a USB flash drive into your computer which have at least as storage capacity as the size indicated by the Windows. After that, Select the USB drive and click on “Next“.
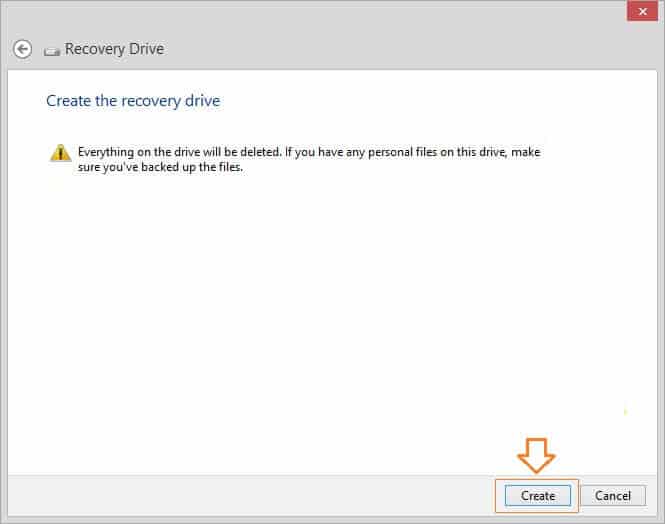
Step (8): On the next screen, you will be warned as “Everything on the drive will be deleted. if you have any personal files on this drive, make sure you’ve backed up the files” If you are using an empty USB flash drive then click on “Create” button.
Step (9): After the click, the recovery image and necessary recovery tools will be copied to your inserted USB flash drive. The copying process will take some time, depending on your computer speed and the size of the recovery image.
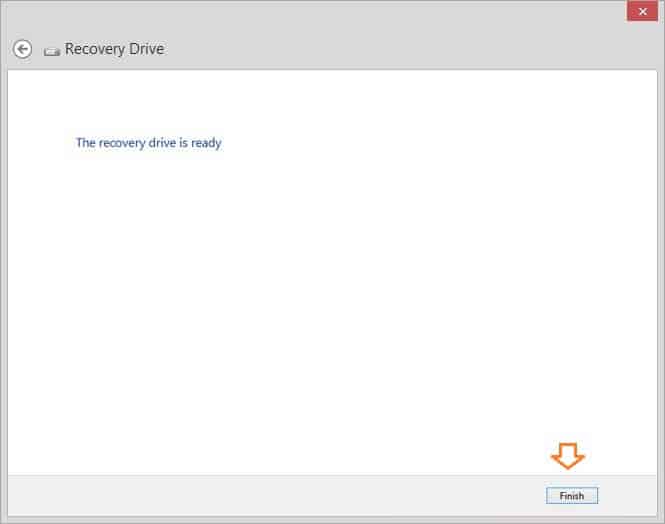
Step (10): Now the confirmation window will appear as “The recovery drive is ready“. Finally, click on “Finish” button.
Step (11): That’s it! You have successfully created the USB recovery drive.
Thus, you can think how simple is to create a USB recovery drive in Windows 8.1 computer. Feel free to ask us through comments if you face any problem while creating Windows 8.1 recovery drive.

