Do you want to learn how to screenshot on a Mac or looking for a Mac screenshot keyboard shortcut? Here are 7 best ways on how to take a screenshot on a Mac.
If you are a Windows user, you know how easy it is to take a screenshot of your display (Yes, it’s pretty simple to take screenshots in Windows 10 or take a screenshot of the selected area in Windows 10). All you need to do is click on the Print Screen button or simply press the Windows + Shift + S keyboard shortcut to quickly take a screenshot, but when it comes to taking a screenshot on Mac, the process isn’t as straightforward.

If you recently switched over to a Mac from Windows (In my opinion, it’s a bad decision) and want to know how to take a screenshot on a Mac? Then fret not, in this guide, we will take a look at the 7 best ways to take a screenshot on a Mac. So, without further ado, let’s jump right into it and learn how to screenshot on a Mac.
7 Best Ways to Take a Screenshot on a Mac
Mac may not have an easy way to take screenshots but that doesn’t mean that there aren’t any. We did a bit of extensive research on it and came up with some of the best ways to screenshot Mac which includes taking a screenshot of full screen, capturing a selected portion of the screen, taking a screenshot of a specific window, capturing a menu, taking a screenshot of the touch bar, and various other ways to print screen on Mac.
Here some of the best and relatively easy ways in which you can quickly take a screenshot on a Mac. It doesn’t matter whether you want to screenshot Mac using the Mac screenshot keyboard shortcut or you want to take a screenshot on Mac without using the keyboard, this guide has all the solutions you need. So, now let’s go and check out the best ways to capture your MacBook’s screen:
How to Screenshot on a Mac (Entire Screen)
Mac has a screenshot shortcut which isn’t clearly evident when you try and use it. If you want a print screen style function to take a screenshot of the full screen of your device then this is the best way to do so. Here’s how to take a screenshot of the entire screen on Mac:
- At first, bring up whatever you wish to screenshot on the screen.
- Now simply press the Command + Shift + 3 keys together.

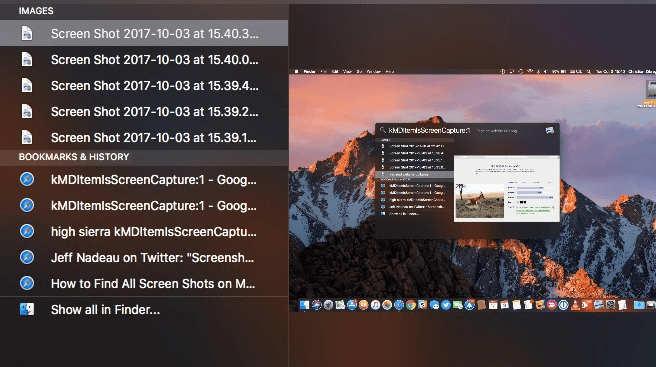
Once you press Command + Shift + 3 keyboard shortcut for screenshot on Mac, a screenshot will be taken and saved to your desktop as a PNG file. The captured screenshot’s name will be in “Screen Shot + year + month + date at time AM or PM” order. For example, it will look like “Screen Shot 2020-28-03 at 12.02.29 PM”.
In case, if you use multiple monitors then a single large-sized screenshot will be taken which you will have to crop after taking the screenshot.
How to Take a Screenshot on a Mac (Capture a Window)
Do you want to take a screenshot of a particular application or simply capture the contents of the currently active window? Well, taking a screenshot of a specific window on Mac is pretty easy too. Here’s how to do that:
- First of all, open the Window you wish to take a screenshot of.
- Next, press and hold Command + Shift + 4 + Space bar keys together.

- Once you press these shortcut keys, your Mac’s cursor will change to a camera icon.
- Now just move the camera icon and select the window you want to screenshot.
This screenshot taking method will allow you to take a screenshot of any specific window and save it for future references.
How to Screenshot on a MacBook (A Selected Portion of the Screen)
If you wish to just grab a small portion of your screen to embed it into a presentation, graphic, or simply want it for any other uses then you can use this method to quickly take a screenshot of the selected area on Mac. Follow these below-given instructions and learn how to screenshot on a Mac and capture a portion of the screen:
- At first, open the window or web page whose part you want to capture.
- Next, press the Shift + Command + 4 keys together.

- Once you press these shortcut keys, your mouse cursor will change into a crosshair pointer.
- Now simply, drag the crosshair to select the area of the screen you wish to capture and then release the mouse button.
The partial screenshot will be automatically captured and saved to your desktop. You can now use or edit this screenshot as you see fit. You can use it in presentations or even various graphics if you wish. Do note that by using this method you may lose out on a bit of quality since there may be a resolution mismatch.
How to Take a Screenshot on a MacBook (Capture a Menu)
Do you want to take a screenshot of popup menus or capture the drop-down menu? Follow these steps and learn how to take the screenshot of a particular menu on Mac:
- First of all, bring the menu up on the screen.
- Next, press Command + Shift + 5 keys together (On the latest version of Mac OS).
- Now, a screenshot menu will appear. You can now either capture a particular part of the screen or capture the whole menu to take a screenshot of the menu.
On the older versions of Mac, you need to perform the following steps to take a screenshot of menus:
- At first, open the menu you want to take a screenshot of.
- Next, press the Command + Shift + 4 keys together.
- Now simply, drag your pointer around the area you wish to screenshot or press the spacebar and then click on the camera icon when it appears.
This is how you can easily take a screenshot on Mac to capture a menu.
How to Print Screen on Mac (Capture the Touch Bar)
If you have the newer Macbooks that come with the touch bar and you wish to take a screenshot of the touch bar then you can use this method to quickly take a screenshot of the included touch bar. When you wish to screenshot the touch bar on macOS Sierra or higher, you need to:
- Press the Command + Shift + 6 keys together.
- The screenshot of the entire Touch Bar will be captured.
You will be able to see the screenshot on your desktop as that is the default save location. This is how you can screenshot the touch bar on your Mac.
How to Screenshot on a Mac using Lightshot App
Are you searching for the best ways on how to print screen on Mac using a third-party screenshot app? If yes then Lightshot is the most appropriate choice for you. Simple to use third party screenshot utility, LightShot is a powerful screenshot app for Mac that can help you take a screenshot with just a few clicks.

Lightshot screenshot tool is the fastest way to take a customizable screenshot. This app is used and preferred by millions of users worldwide on both Windows and Mac platforms. Some of the most valuable features of the Lightshot screenshot capture tool are:
- Fast screenshot of the selected area
- Easy-to-use application
- Share screenshots via the Internet
- Powerful editors
- Similar image search
- Various Platforms
- Screenshot History
- Keyboard Shortcuts to Make it Even Faster
We hope now you are well familiar with the Lightshot and its amazing features. Now let’s have a look and learn how to take a screenshot on a Mac using Lightshot:
- At first, open the window, application or whatever you wish to screenshot on your screen.
- Next, open the Lightshot screenshot app and use its tools to select what you wish to screenshot.
- Once you have selected and captured the screenshot, you can annotate it using the other toolbar provided by the Lightshot.
- You will now be able to save this to your local storage or upload it to the cloud for public usage by using an online utility such as prntscr.com
How to Print Screen on the Mac Using Skitch App
When it comes to using free third-party apps for taking a screenshot on Mac, most of the people recommend trying the Skitch screen capture app. Skitch is another most popular and best screenshot apps for macOS that helps you take screenshots and annotate them using the app.

If you want to share a story through screenshots then this method that involves using Skitch to print screen on Mac would be ideal for you. To use the Skitch app and take a screenshot on mac:
- At first, open that particular window, application, or webpage you wish to screenshot.
- Next, open the Skitch app and then click on the Screen Snap option.
- Once you click on the Screen Snap option, your mouse cursor will change into a crosshair pointer.
- Now simply, drag the crosshair to select the area of the screen you wish to capture and then release the mouse button.
- In case, if you want to take a screenshot of the entire screen on Mac, simply click on the drop-down menu next to Screen Snap and then select the Fullscreen option.
It also allows you to change the settings within the app according to your needs. You can also annotate and add design elements to your screenshot using the Skitch screen capture utility.
This is how you can quickly take a screenshot on a Mac using the Skitch screen capture app for Mac.
Where Do Screenshots Go on Mac?
Are you wondering where do I find my screenshots on a Mac? Where do screenshots go on Mac? Well, By default, the screenshots taken using the above-explained methods are saved to your desktop with the name as the date and time you took the screenshot.
As we have already mentioned earlier in this guide, all the captured screenshot’s name will be saved on your desktop in the following order:
Screen Shot + year + month + date at time AM or PM
So for the example, if you have captured a screenshot on your Mac on the date of 28 March 2020 (around 9 AM and a few minutes later) then the name of the saved screenshot will be something like:
Screen Shot 2020-28-03 at 09.08.29 AM

If you are unable to find the screenshot then you can quickly look for them using the finder. You can also copy these screenshots to your clipboard if you quickly right-click on the thumbnail that appears in the bottom right when you take a screenshot.
In addition to these things, if you want to change the default storage location then go to the Utilities folder and click on the screenshot app then from the settings you can change where your screenshots are saved.
Final Words on How to Take a Screenshot on a Mac
So this was our comprehensive guide on how to screenshot on a Mac where we have covered five different methods (using the Mac screenshot keyboard shortcut) and two third-party screenshot apps for Mac. And we hope this tutorial helped you in knowing all the fastest and best ways to screenshot Mac or print screen Mac.
If you ask us – Which is the most preferred way of taking screenshot on Mac? Our answer would be, of course, the Mac keyboard shortcuts for screenshot. Whether you want to capture the screenshot of full screen, a selected portion of the screen, a specific window, a menu, or the touch bar, everything is smoothly possible using the Mac screenshot keyboard shortcut.
We are certain that we satisfactorily answered all your questions, How to take a screenshot on a Mac? How to print screen on Mac? What is the best screen capture software for Mac? Where do screenshots go on Mac? and What are the best ways to screenshot Mac?
Got any more questions regarding taking a screenshot on Mac? Want us to help you learn anything else? Or just want to chat with fellow nerds? You know where to find us, right in the comments below.
You may also be interested in checking out:
- How to Take a Screenshot on Windows 10
- Where is the Snipping Tool in Windows 10 and How to Open It?
- How to Take Screenshot of Selected Area in Windows 10
- How to Record Your Screen on Windows 10 with Sound for Free
- Top 15 Best Screen Recorder Apps for iPhone and Android
- How to Print Text Messages on iPhone (100% Working Method)
- How to Screen Record on iPhone XR with Sound (2 Methods)