Restoring previous versions of files from a backup or a restore point is one of the best features of Windows operating system. It offers the users to restore previous versions of file and folder in different edition of Windows.
If you accidently deleted a file or folder, or mistakenly removed an essential part of a document then you feel so hurt and you realize that it was a blunder. But recovering deleted files or folders, previous version of word document and other documents in Windows 7 is quite simple.

There is no need to use any data recovery software or recovery programs to restore previous versions of files in Windows 7 computers, because Windows 7 operating system allows users to restore previous versions of files just by clicking on the option of “restore previous versions“.
In today’s guide, we will show you – how you can restore previous versions of files in Windows 7 without using any recovery programs or data recovery software. Here’s how:
See also: How to Find and Delete Empty Folders on Windows 8, 7, Vista, or XP
Restore Previous Versions
Accessing previous versions of any file or folder on Windows 7 computers is quite easy. Only you have to do few mouse clicks and you will be able to restore previous version of your desired files or folders.
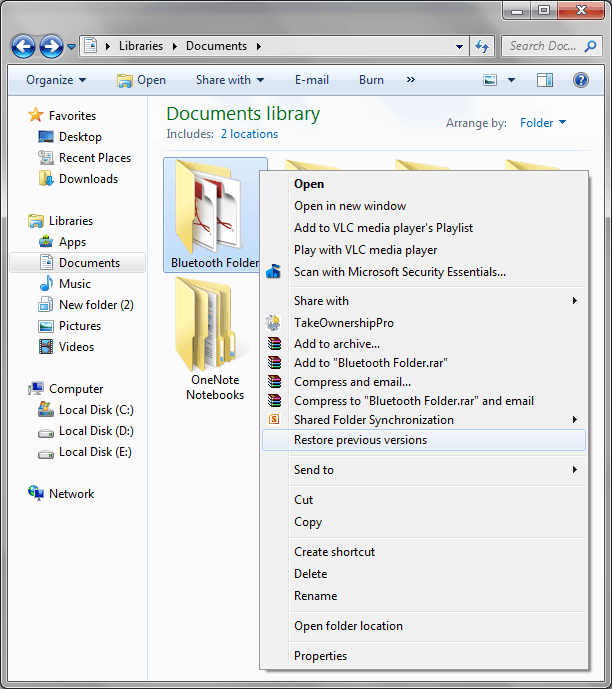
First of all, open explorer window on your PC and right-click on a file or folder which you wish to restore and then select “Restore Previous Versions” option.
For example ~ here we are restoring previous versions of a folder named “Bluetooth Folder” and that is located inside the Documents Library.
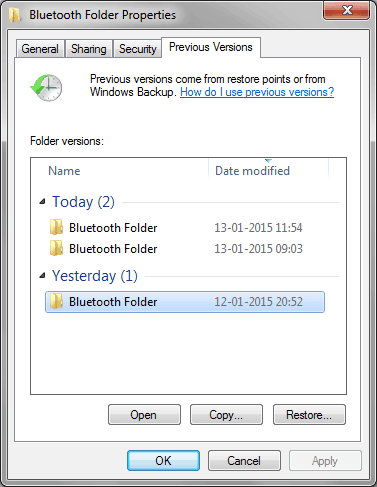
After selecting Restore Previous Versions option, a dialog-box will appear along with all previous versions (copies) of selected folder that are available. As you can see in below screenshot, there are three copies of same folder. One copy of Bluetooth Folder is from yesterday, and 2 copies of today.

To restore previous versions of folder, simply select the folder which you wish to restore and then click on “Restore…” button.
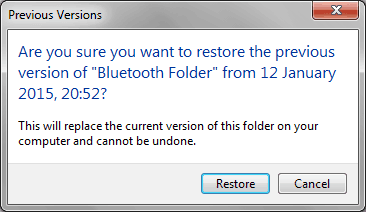
Just after clicking on restore button, a pop-up will appear which will ask you to confirm. So, click on again “Restore” button to confirm.

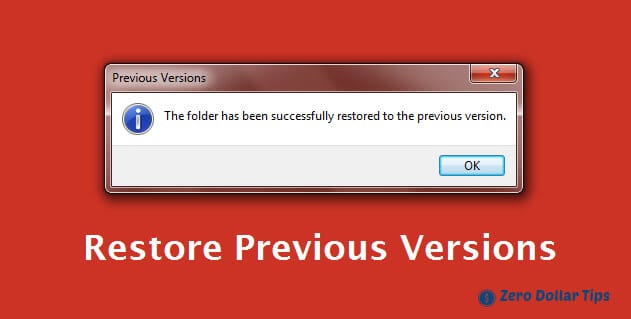
Within few seconds, the previous versions will be restored. When the previous version of selected folder is successfully restored, you will get a confirmation message as shown in below screenshot:
Click on “OK” and go to the restored folder to see the previous versions of files and documents. That’s it!
Important note: Clicking on “Restore” will replace the current version of selected file or folder. If you doesn’t want to overwrite the previous version on current version then simply copy the previous version and save it to desired folder. Or you can also send it directly to external hard drive or USB device.
Feel free to ask us if you face any kind of difficulty while restoring previous versions of files or folders in Windows 7 operating system. If you have any other quick ways to restore previous versions of files in Windows 7 computers then please suggest us though comments, your comments will be always appreciated here.
To get more Windows tips and tricks, Windows help, computer tricks related to Windows 7 operating system, check out our Windows 7 Tutorials section.


The option for restore previous versions is not showing on right click in my system.
My OS is Windows 7 64-Bit.
Please help!