Want to restrict unauthorized access via USB drive to your Windows 10 PC? Go through the expert’s guide here and know how to disable USB port in Windows 10 and steps to enable it again. Shield your confidential data from the anonymous hands. Here you go!
How many times have you seen that your access is blocked for the USB drive or external hard drive at your college or workplace? I think many times, as I have also faced the same. In fact, whenever you try to put the USB drive in, you aren’t permitted as the administrator has disabled the USB drive detection on that Windows computer.
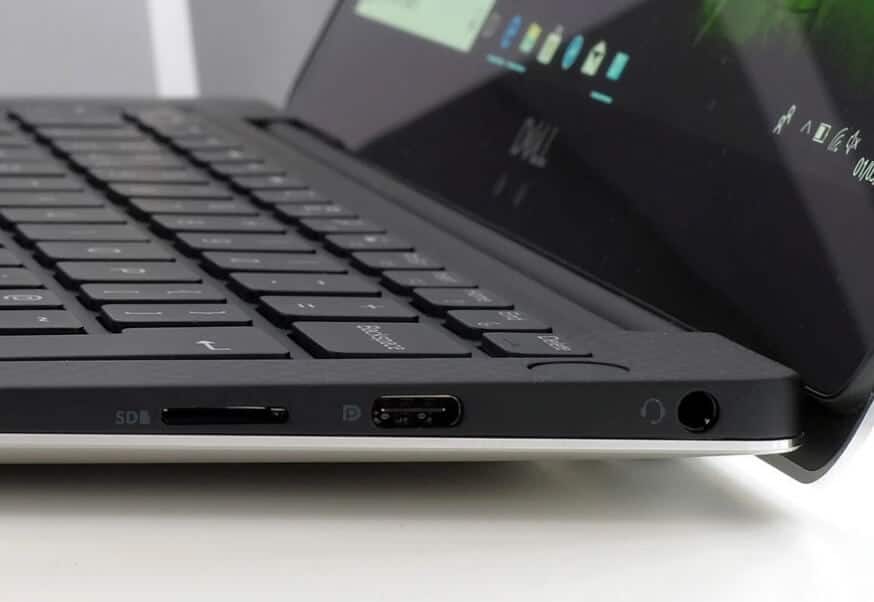
On the other hand, how many times have you been afraid of the data breach or malicious attack on your computer when someone connects an unauthorized USB?
Well, two problems one solution- restrict access to USB storage devices! Nothing to worry about, this guide will help you know how to disable USB port in Windows 10, along with the process of enabling it. So, let’s start!
Why You Should Disable USB Ports in Windows 10?
Can you ever be too cautious when it comes to safeguarding your important and personal data? No, of course! Because you never know when and from where the threat comes!
Suppose one of your family members takes your computer for a minute and inserts the USB drive to upload anything, but what if the pen drive has any malware, spyware, or virus that the person is not aware of?
You can’t do anything but losing your data. Your PC becomes vulnerable to potential threats.
So disabling your PC’s USB drive is the only thing that can help you to avoid such situations. The process of doing the same is easier than you’ve ever imagined. So without further delay, let’s learn how to disable USB ports on Windows 10 laptop or desktop computer.
You might also like: 16 Best Windows 10 Context Menu Editor to Edit Right-Click Menu
4 Best Methods to Disable USB Ports in Windows 10
There are a number of ways to prevent users from connecting to a usb storage device on Windows 10 computers. But we’ve picked only the easy and 100% working methods to make sure there is no further inconvenience.
You can use the Device Manager, Registry Editor, Group Policy Editor, or any third-party software to restrict access to USB storage devices.
Are you wondering how? Well, scroll down to know it all!
How to Disable USB Port in Windows 10 using the Device Manager
You can easily block USB ports in Windows 10 by disabling Universal Serial Bus Controllers through Device Manager. But in order to do so, you have to uninstall the USB mass storage drivers from your computer permanently.
And once you uninstall the same, all the USB ports will be inaccessible instantly, and none can connect USB drives into your PC. Let’s see how to do it:
Note: You must create a restore point before starting with this process because you may like to enable it again someday.
- First of all, right click on This PC and click on Manage.
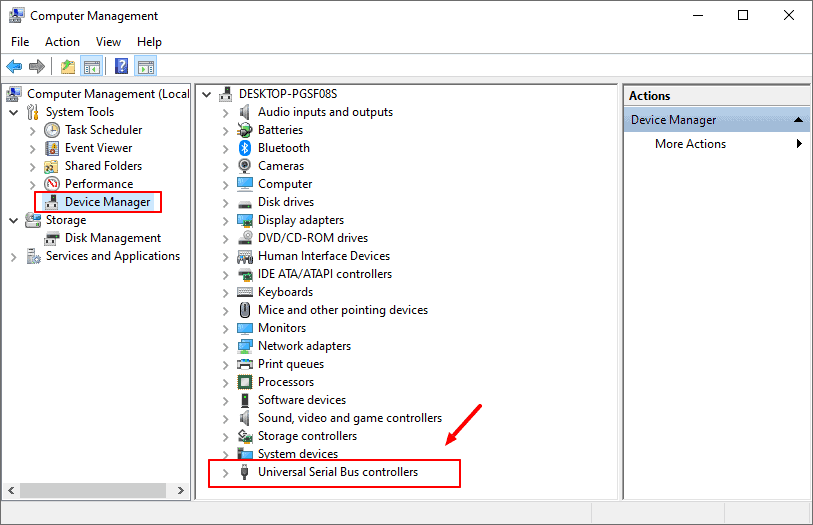
- Now the Computer Management window will be opened. Here, click on the Computer Management > System Tools > Device Manager at the left pane.
- Next, from the list of devices, expand the Universal Serial Bus controllers by double-clicking it.
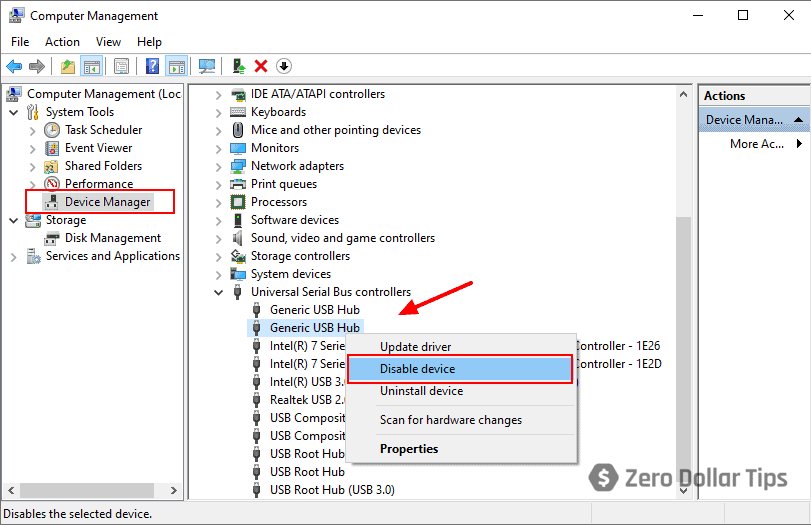
- And under this section, select a device, right-click on it and select Disable device. Do this for all the devices listed there.
Now see if this method works or not. In case your still finding answers for how to block USB port in Windows 10, here are our rest of the methods to help you out.
Do you know? How to Fix NVIDIA Control Panel Missing Options in Windows 10
How to Block USB Port in Windows 10 through Registry Editor
One of the best methods to block USB ports in Windows 10 is using Registry Editor. In this way, you have to make some changes in the Windows registry settings to disable or enable USB Drivers and Mass Storage access.
Have a look at the steps on how to disable USB ports in Windows 10 using Registry Editor. Here we go:
Warning: Editing the Registry Editor is quite a sensitive task. So you must take a registry backup before starting with the steps.
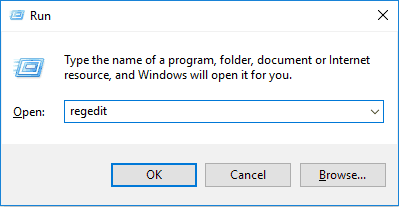
- Press the Windows + R keys together to open the Run dialog-box and then type in Regedit and hit OK.
- Now the Registry Editor will be opened, and you will be prompted to a window where you have to navigate to;
HKEY_LOCAL_MACHINE\SYSTEM\CurrentControlSet\Services\USBSTOR
- Next, double-click on the Start key and then change the value data with 4 to disable USB ports.
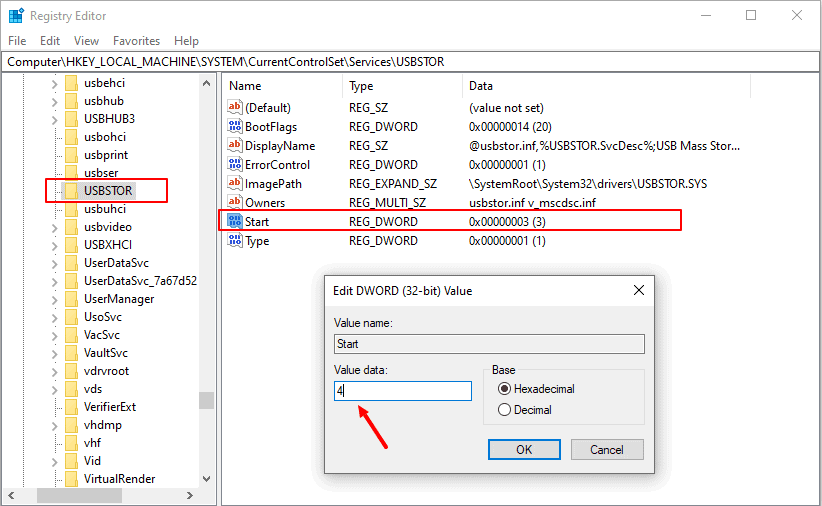
Note: If you want to enable the USB ports in the future, change the value data with 3.
- Finally, close the Registry Editor.
If you don’t want to perform it or to have any difficulties while doing the steps, scroll down to our next method.
You might also like: Top 12 Best USB WiFi Adapter for Windows 10
How to Disable USB Ports on Windows 10 using the Group Policy Editor
Here is another effective method to disable USB ports of your Computer, through Group Policy Editor. Follow the below steps one by one to reach the optimum solution.
Step 1: Press Win Key + R button at the same time to open Run
Step 2: Type gpedit.msc and hit OK to open the Group Policy Editor
Note: Windows 10 Home Edition users, must install gpedit.msc installer first to open the Group Policy Editor as it doesn’t come inbuilt with this version of OS.
Step 3: Now, click on Computer Configuration, then select Administrative Templates, hit System, and finally click on the Removal Storage Access option.
Step 4: On the right-side pane, find;
- Removable Disks: Deny execute access
- Removable Disks: Deny read access
- Removable Disks: Deny write access
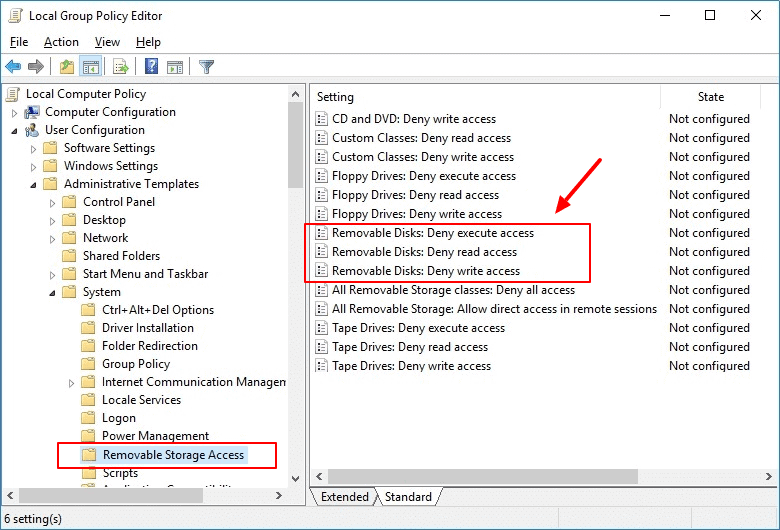
Step 5: Next double click on each of them to configure.
Step 6: On the configuration window, select Enabled, then hit Apply, and finally select OK. Do this for all the three option!
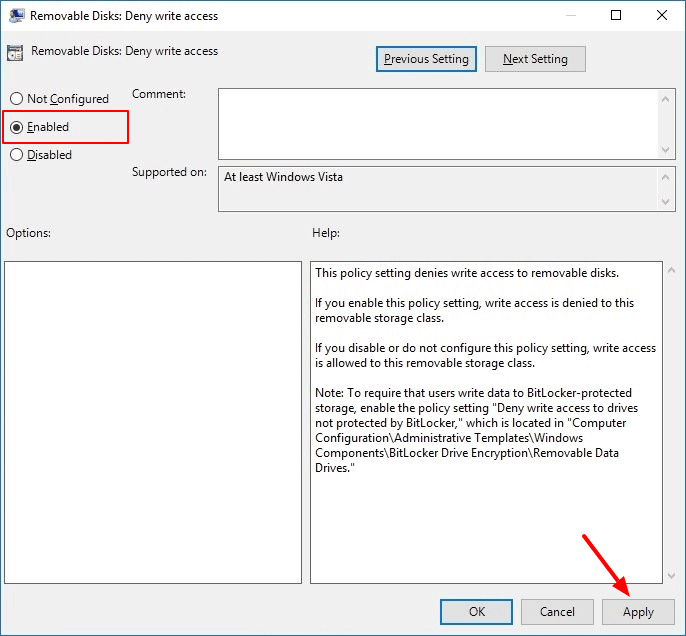
This will disable all the access like execute, read, write to any removal disk along with USB storage devices that are connected to the Computer. In case you want to enable it someday, just set it to Disabled or Not configured.
Must see: How to Reset Forgotten Windows 10 Password with Bootable USB
How to Disable USB Port in Windows 10 using the USB Disabler Pro
If you don’t want to get into all these technical meshes, third-party software can work the best. For instance, suppose you are using USB Disabler Pro, you have installed the file to your hard drive first.
Next, you have to run the setup file, install it, and pick an administrator user group while prompted. After successfully creating your account, follow the below steps to complete the rest of the process. Here we go:
- Launch USB Disabler Pro and click Block all users followed by Apply.
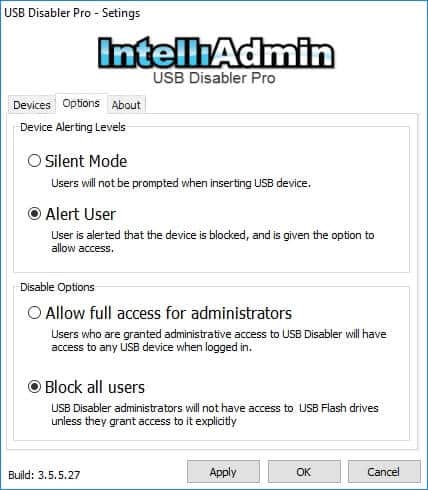
- Once you hit the Apply, USB disabler will move to the background and start disabling your USB ports.
- Access the USB disabler Pro from the system tray to allow a particular USB device.
That’s all! Now you are completely secured from any unauthorized access through USB drives.
How to Restrict Access to USB Storage Devices in Windows 10
I hope this guide was able to compensate your query; how to disable USB port in Windows 10 to prevent users from connecting to a usb storage device? Please feel free to share your opinion with us.
Also, if you have further queries or any pro tips on the same topic, put it in the comment box below. Our experts will be right there to help you with proper resolution. Till then, Sayonara!
You may also be interested in checking out:
- How to Fix USB Device Not Recognized in Windows 10
- How to Transfer all Google Drive Files to Another Account
- How to Fix External Hard Drive Not Showing Up in Windows 10
- 22 Best Free Driver Updater Software for Windows 10