CHKDSK Windows 10 – A lot of readers of our website have asked us that what is CHKDSK in Windows 10 and how to run CHKDSK in Windows 10? If you are not a computer geek or don’t know about CHKDKS then you are at the right place as today we are going to tell you – What is CHKDSK in Windows 10 and how to run Check disk in Windows 10 computer?
We will be sharing a total of three methods which will help you in opening the check disk feature on your Windows 10 computers.
You may also be interested in checking out:
What is CHKDSK?
CHKDSK (short for Check Disk) is a command which you can use in your Windows computer in order to check the disks which are present in your computer. You need to use elevated command prompt to start the check disk wizard of a hard disk drive. As we know that there are a lot of files, folders and folders within other folders present on our computer, Windows 10 CHKDSK will help you in gathering information about all the files which are present on your Windows 10 system.
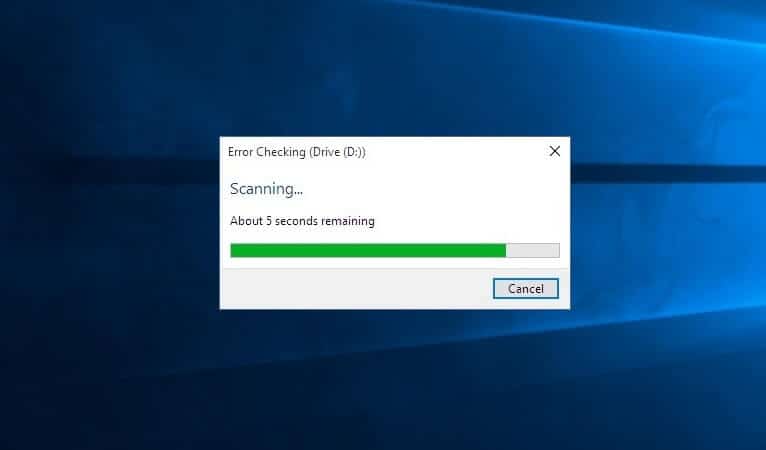
CHKDSK will not only work on the drives which are present in your computer but also the pen drives or the memory cards which you have connected with your system. If there are any malware present on your computer, or you didn’t remove the removable drive without safely ejecting it then there might be errors on your computer. CHKDSK Windows 10 will help you in repairing all the errors on your computer.
How to Run CHKDSK in Windows 10
Now you know pretty much everything about CHKDSK utility & Windows 10 CHKDSK, so let’s find out how to run CHKDSK in Windows 10 system. Although, there are plenty of ways to run check disk in Windows 10 computer but here we have explained only few most active and easy to perform methods (Run CHKDSK in Windows 10 using Command Prompt, using This PC, and using Cortana).
So, let’s check out below given top 3 methods to run CHKDSK in Windows 10 computer:
Method 1: Run CHKDSK in Windows 10 using This PC
This is the first method which makes to our guide of how to run check disk in Windows 10. In this method, we are going to take help of This PC to run check disk in Windows 10 system. Here’s how to do so:
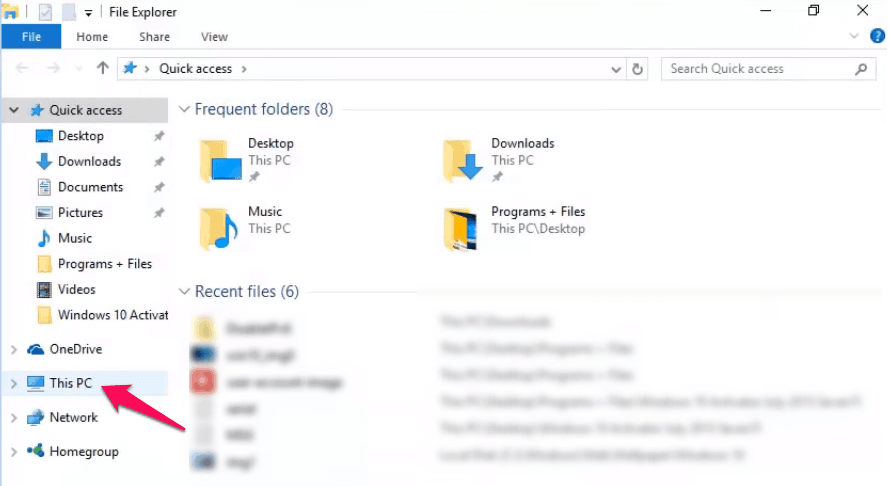
Step (1): First of all, open File Explorer on your computer and then select This PC.
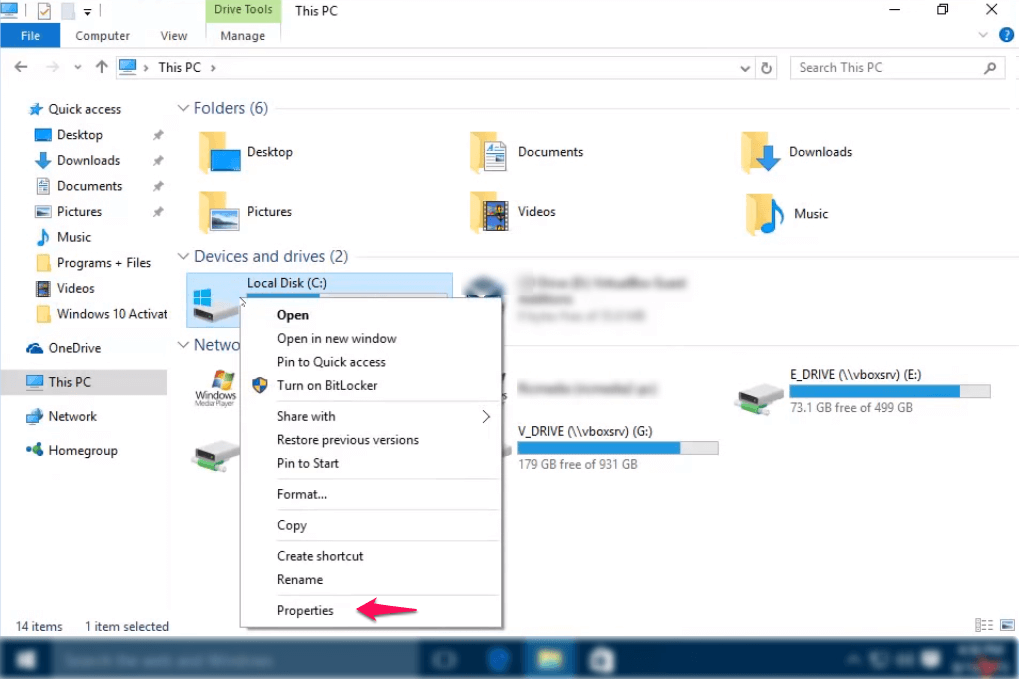
Step (2): Now you have to right-click on the hard disk drive where you want to perform CHKDSK in Windows 10 and then select Properties option.
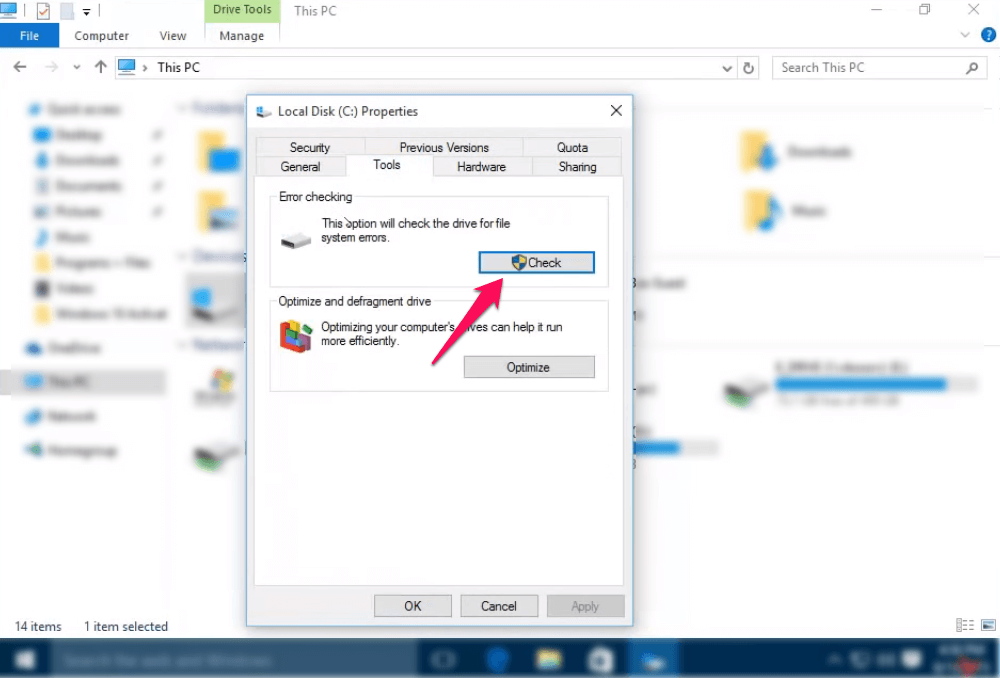
Step (3): From the selected drive’s Properties dialog box, select Tools menu. Once you have opened Tools, you will see Error checking option saying “This option will check the drive for the file system errors.”.
Step (4): Select Check option from here to start Windows 10 CHKDSK process.
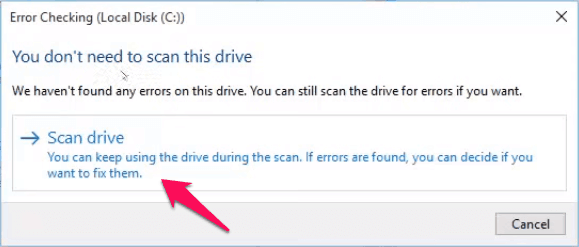
Step (5): Just after clicking the Check button, if an Error Checking dialog box saying “You don’t need to scan this drive” appears on your computer screen then simply click the “→ Scan drive” option.
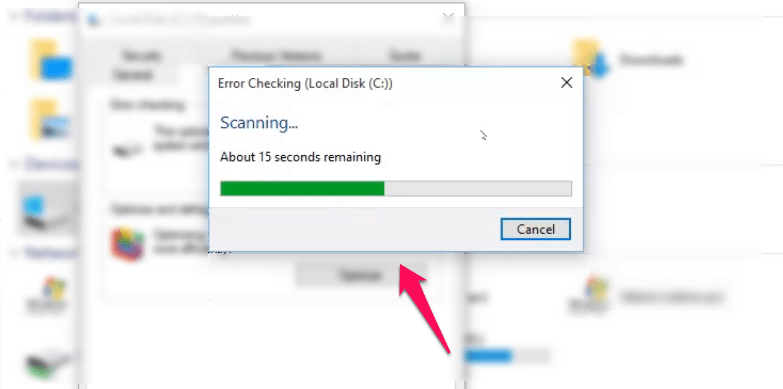
Step (6): CHKDSK will now start to run on your Windows 10 computer. That’s it!
Thus, you can see how simple is to perform disk checking in Windows 10 computer using This PC.
Method 2: Run CHKDSK in Windows 10 using Command Prompt
Applying check disk command in Windows 10 via command prompt is also one of the most convenient ways. If you like using Windows command prompt then you should try this method for Disk Error Checking in Windows 10 PC:
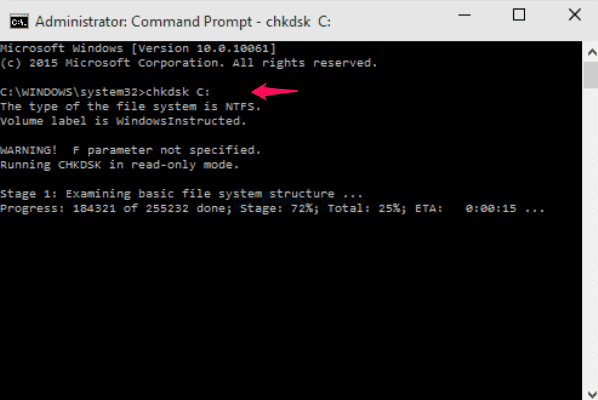
Step (1): At first, open elevated command prompt with administrator privileges in Windows 10 by pressing the Windows + X button and then selecting Command Prompt (Admin) from the list.
Step (2): Now enter the CHKDSK Windows 10 command line which we have mentioned below (Note: Replace X with the drive where you want to perform Check disk):
CHKDSK X:
Step (3): After that hit Enter and the Check Disk process will start on your Windows 10 computer.
If you want to fix the errors which are detected during the check disk process then you can enter the command mentioned below:
CHKDSK X: /F
(Note: Replace X with the drive where you want to perform Check disk and fix the errors)
Method 3: Use Cortana to Run CHKDSK in Windows 10
As Windows 10 comes with Cortana, we can use it to run Check disk too. You can follow the steps which we have mentioned below as they will help you in running Check disk on Windows 10 computer. Here’s how:
Step (1): Firstly, type the below mentioned CHKDSK Windows 10 command line in the Cortana Window.
CHKDSK X:
(Note: Replace X with the drive where you want to perform Check disk)
Step (2): Once you have entered the command, Cortana will open command prompt automatically and will open check disk tool.
Once the Check disk wizard is opened the process of checking the discs will begin. The time to complete this process will depend on the capacity of your hard disk drives and how much data is present in them.
Conclusion
These are the top 3 methods which make to our guide of how to run CHKDSK in Windows 10 computer. You will be able to perform check disk on your computer easily by following the above three methods. Let us know using the comments section below – Which method to run Windows 10 CHKDSK or check disk error worked best for you?
Thanks for this nice article. Keep it up. 🙂