TP-Link Router Bandwidth Control – Learn how to set bandwidth limit on TP-Link router per-user? How to configure bandwidth control in TP-Link wireless router?
Nowadays, High-speed internet connections are available both for home and office use. You can easily get up to 10 MBPS internet connection in your home and enjoy high-speed downloads on your computer or mobile phones. Different internet service providers have different packages but there is a common policy which all the internet service providers follow which is also a Fair Usage Policy. There is no doubt that you will get high-speed downloads with the internet connections these days but after you have surpassed a certain limit, you will have to compromise with slow speed.
Previously, we have shared a very detailed guide regarding Wi-Fi and Li-Fi technology. You may also be interested in checking out:
“ What is the Difference Between Li-Fi and Wi-Fi? ”
Let’s say you are using a broadband plan which provides you 4 MBPS speed for the first 25 GB. Once the 25 GB limit is passed, you will get slow 1 MBPS speed. As you are getting 4 MBPS speed on your internet connection, you won’t be able to keep a track of how much data you have consumed as you are having a high-speed internet connection. You will undoubtedly enjoy the first 25 GB provided by your internet service provider but as soon as that limit is crossed, you will merely get 100 kbps download speed.
Now if you are using broadband connection at your home and you are the prime user then you can manage the data usage easily as you know that how much data you are consuming, however if there are multiple users of the broadband connection it is going to be difficult for one to keep track of the data usage. The best option which you have here is to set bandwidth limit.
As there are plenty of wireless routers available in the market, so the methods to guide of how to set bandwidth limit in router is going to be different. One of the most widely used routers is from TP-Link. So, if you are using a TP-Link Router and are wondering how to set bandwidth limit on TP-Link router then you can follow the guide which we have explained below.
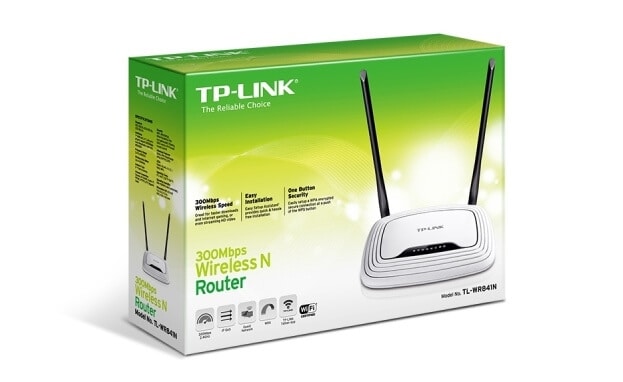
Important Note: The TP-Link wireless router which we are going to use as an example in this guide is going to be TP-Link 300 Mbps Wireless N Router. The model number of this TP-Link wireless router is TL-WR841N. Let’s find out how to set bandwidth limit on TP-Link router.
Related tips you might like »»
- How to Turn Your Windows 10 PC into a Wi-Fi Hotspot
- How to Recover WiFi Password on Windows 10
- Top 5 Best Cydia Apps to Hack WiFi Password on iPhone
- How to Find Your WiFi Password on Android Phone
- How to Disable Internet Connection Sharing in Windows
- How to Share Android Phone’s Internet Connection with Other Phones
How to Limit Internet Bandwidth on TP-Link Router
Only you have to make few simple changes in the TP-Link router configuration in order to set bandwidth limit on TP-Link router. So, now follow the steps shared below and find out how to set bandwidth limit on TP-Link wireless router:
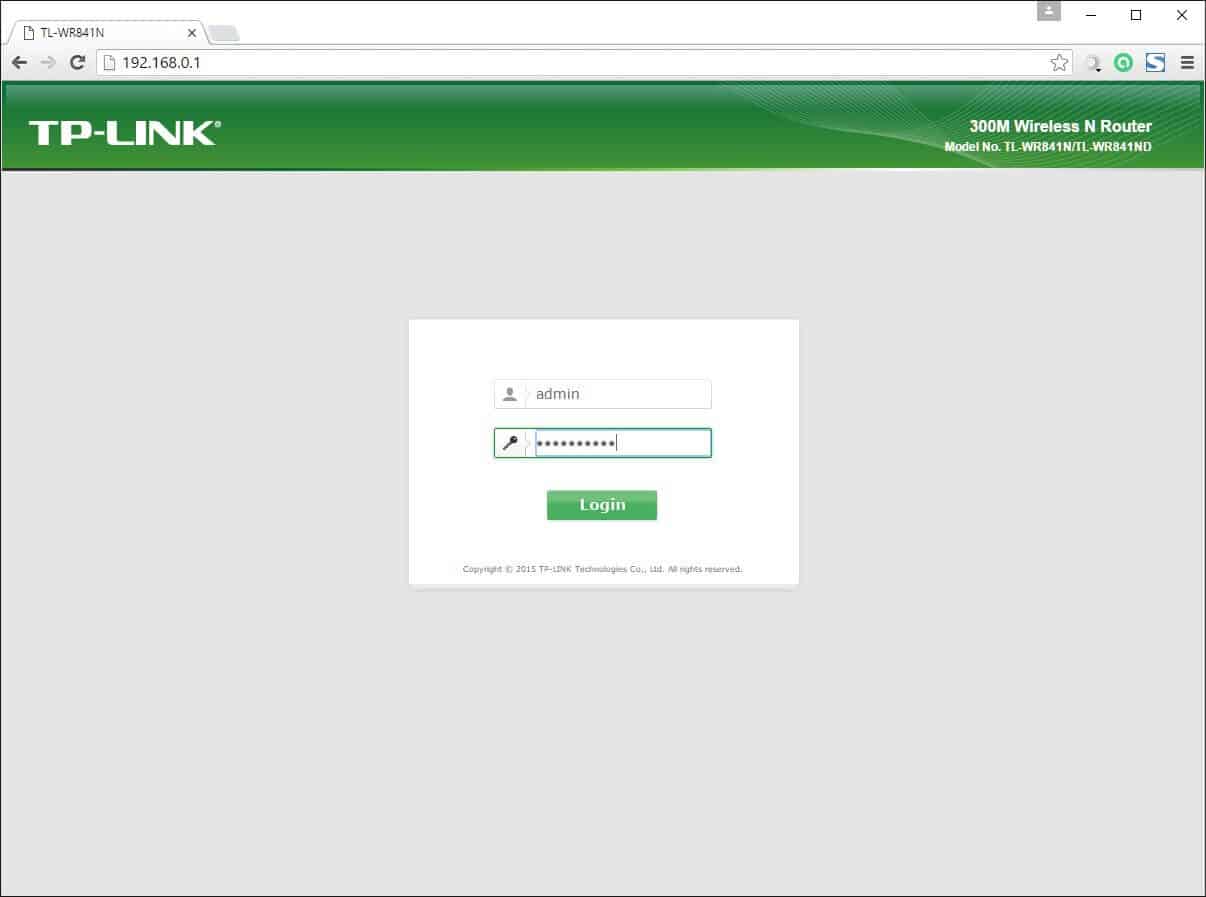
Step (1): To start to link router configuration, you have to open a browser on your computer and then enter following IP Address:
192.168.1.1
Step (2): The login page of your TP-Link router will be opened. You need to enter the username and password here to set bandwidth limit on tp link router. The default username and password are “admin“.
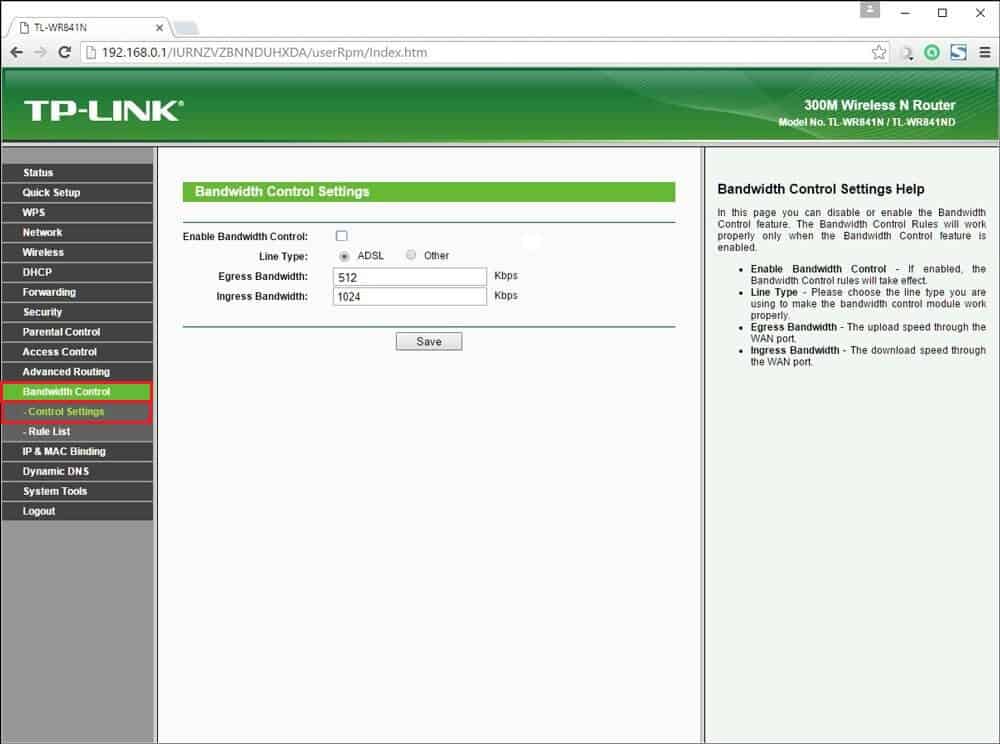
Step (3): You will login into the admin panel of your TP-Link router. Now in order to limit internet bandwidth on TP-Link Router you have to go to Bandwidth Control → Control Settings from the menu present on the left side.
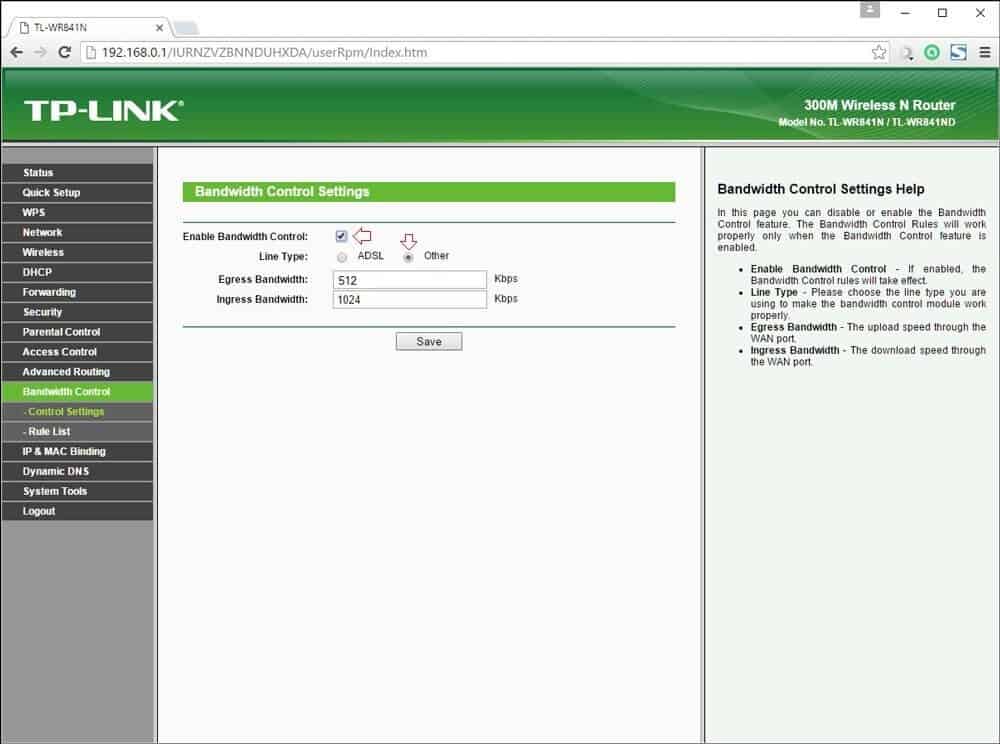
Step (4): From Control Settings, you have to choose Enable Bandwidth Control option and then select Other from the Line Type option.
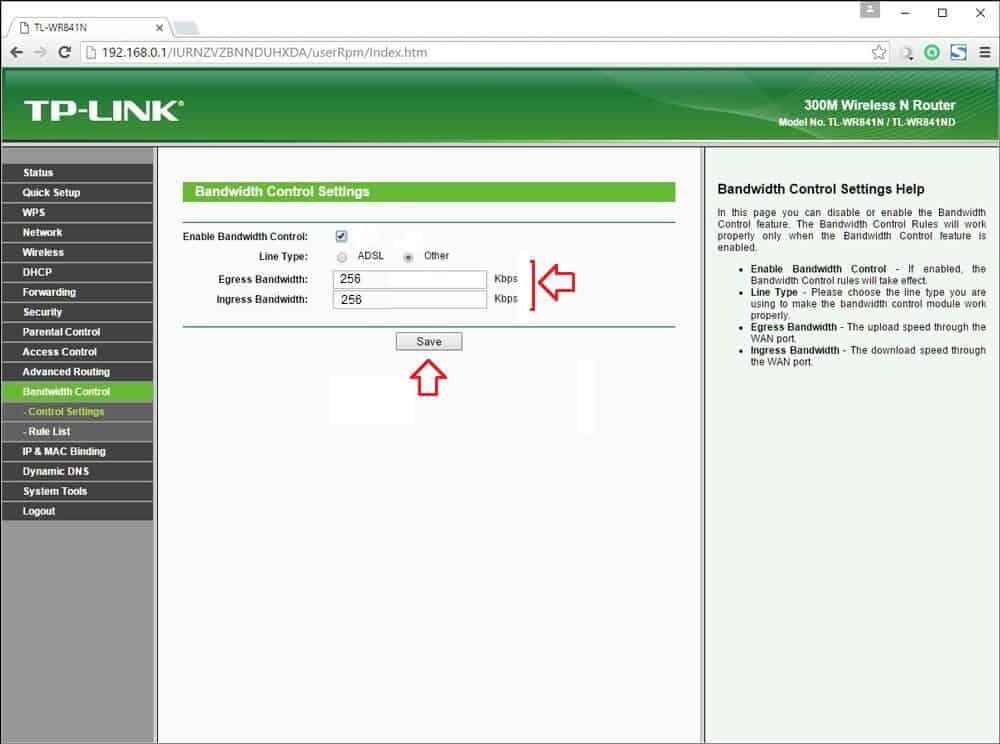
Step (6): The last thing which you have to do in order to configure bandwidth control in TP-link router is to mention the upload and download limit. You will see Egress bandwidth and Ingress Bandwidth.
Upload Speed is known as Egress Bandwidth whereas Download speed is known as Ingress Bandwidth. Set the download and upload limit which you want to use in a month.
Step (7): Once you have entered all the things required, click on the Save button. This will configure bandwidth control in TP-link router.
The above-shown bandwidth limit configuration on TP-link router will be applicable for both Wi-Fi and LAN users. Thus, you can see how simple is to set bandwidth limit on TP-link router. By following these steps (explained above), you can easily fix the TP-Link router bandwidth control and limit internet bandwidth of Wi-Fi users with TP-Link wireless router.
Conclusion
We hope that our guide “how to set bandwidth limit on TP-Link router” perfectly helped you in managing your monthly bandwidth limit. The methods to set bandwidth limit on TP-link router might differ from model to model. So, if your TP-Link router model is different or you are not able to understand how to set bandwidth limit in router or TP-Link router bandwidth control using the above steps, use the comments section below to contact us and we will be happy to assist you.
Also, let us know – which methods you are applying in order to configure bandwidth control in TP-link router? How to set bandwidth limit on TP-link router for restricting data usages per-user?
You might also like: How to Turn Your Windows 10 PC into a Wi-Fi Hotspot
