Want to set up a child’s account in Windows 10? Learn how to create Windows 10 Child Account to monitor your child’s PC activity and online activities
It is very important that you keep track of all the activities of your kid. You should keep an eye on your kid as soon as he leaves the house or he sits on the computer. You are the only one who is going to keep track of the young one as he is innocent and he might get into trouble if indulged into wrong practices. Kids use the computer to complete their homework, assignments, and school projects. You have to make sure that your child is using the computer in the right way and only for education.
Microsoft has added the concept of child account with the help of which you can monitor the activity of your child. The Microsoft Family safety feature makes sure that your child is not able to access anything inappropriate and you are also able to monitor the activity of your child.
It is very easy to create Windows 10 child account. Within a few minutes, you can create windows 10 child account and start monitoring your kids activities. Here’s how to create Windows 10 child account and set up to monitor your child’s PC activity.
Related tips you might like »»
How to Create Windows 10 Child Account
It’s little different to set up a child’s account in Windows 10, but it’s very useful too. Monitoring child’s computer activity and guiding them to choose the right career path is the most important responsibility of every parent. So, follow the below-mentioned step by step instructions to set up a Windows 10 child account:
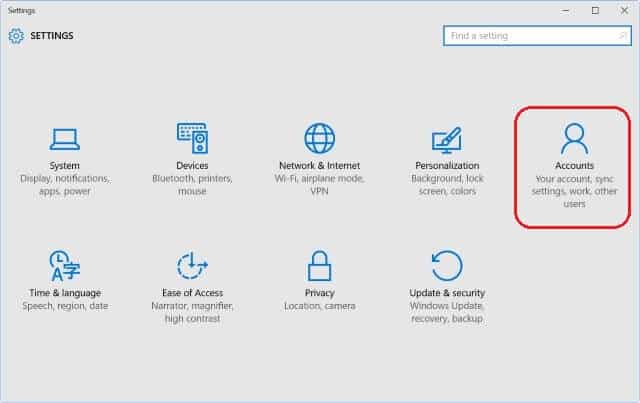
Step (1): The first thing which you have to do to create Windows 10 child account is open Settings on your Windows 10 PC and click Accounts option.
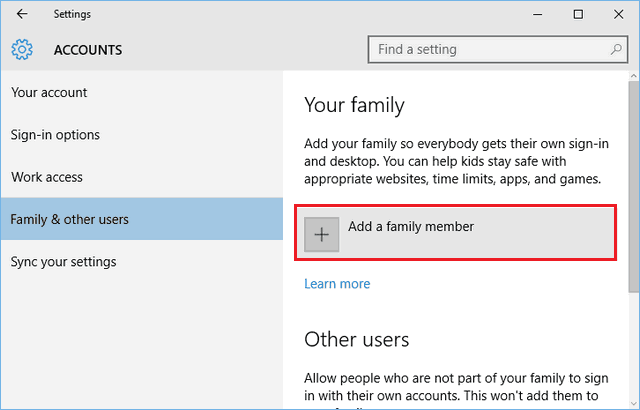
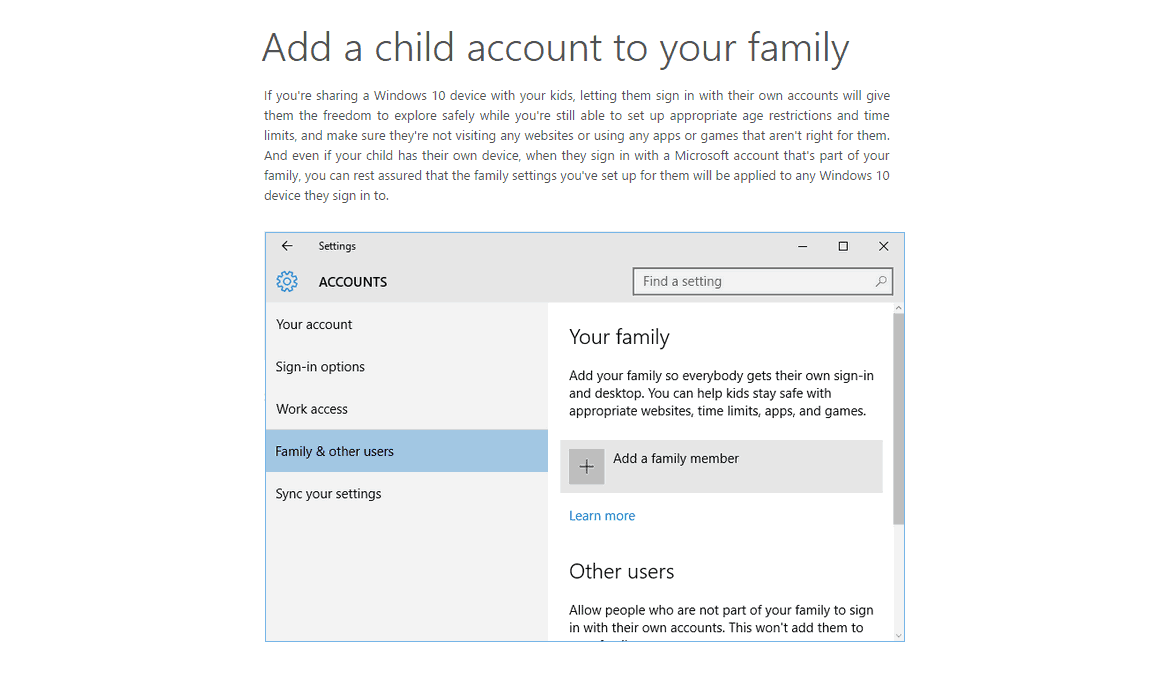
Step (2): From the options available under the Accounts, select Family & other users option and then click on + Add a family member link.
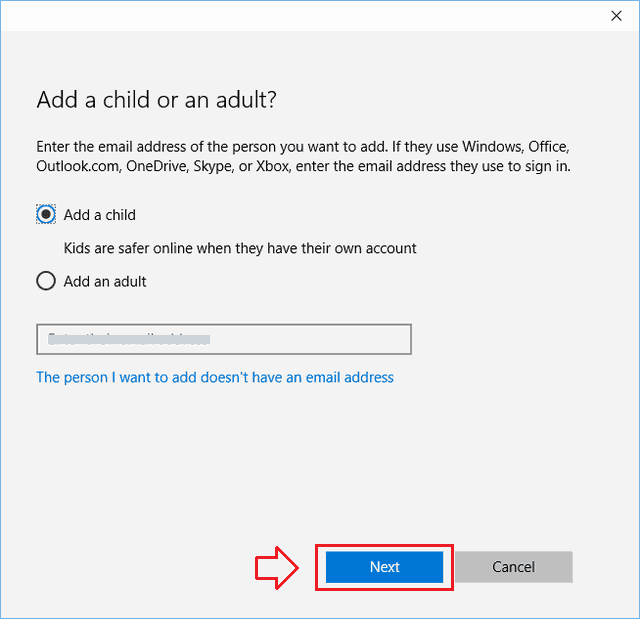
Step (3): On the next screen, you will be able to see Add a child or Add an Adult options. In order to set up a child’s account in Windows 10, simply select “Add a child” option and enter the child’s Microsoft account email address then click on Next button.
Important note: In case, if your child is not having any a Microsoft account, then you can easily proceed to set up an outlook.com account by clicking “The person I want to add doesn’t have an email address” link.
Step (4): Now, you will be asked to confirm the action. So, simply click the Confirm button.
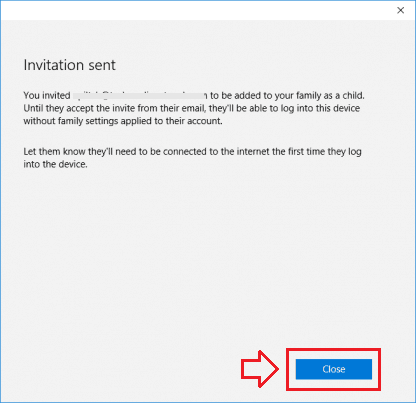
Step (5): Just after the confirmation, the invitation will be sent to your child’s email account. So, now close the invitation window.
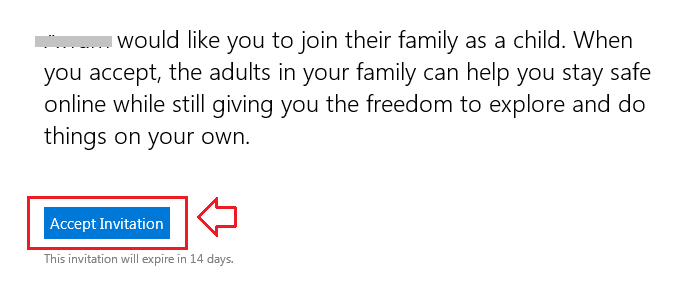
Step (6): The sent invitation must be accepted by your kid. Once it is accepted, your kids will be able to login with their account on the PC.
Step (7): After the acceptation of invitation by your kid, now you’ll be able to set up appropriate websites and apps and games restrictions for their age, set PC time limits, and review their recent activity etc.
Step (8): To set up appropriate websites, apps, and games restrictions for their age, open Settings → Accounts → Family and Users then click “Manage family settings online” link.
Step (9): After that, select the child’s account whose permissions you wish to manage.
Step (10): Now, you can use the controls to set restrictions on what websites your child can see, what apps they can use, what games they can play, and how long they can use the computer. Once you set the needed restrictions, now feel relaxed. All by default, you will get the weekly activity reports in your mail.
That’s it! You are done now. You have successfully created a child’s account in Windows 10. Now your child can log in to the account and access the PC. Thus, you can easily monitor your child’s PC activity and all other online activities.
Family Safety in Windows 10
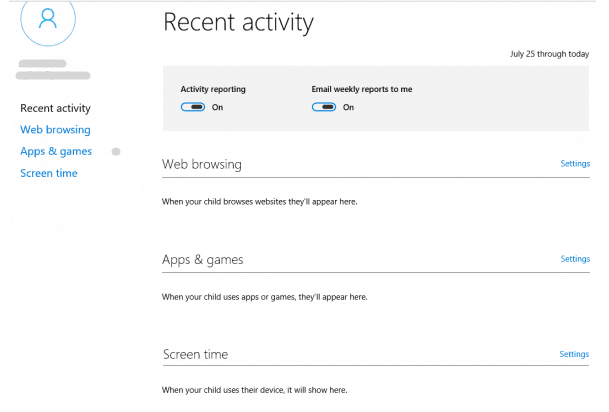
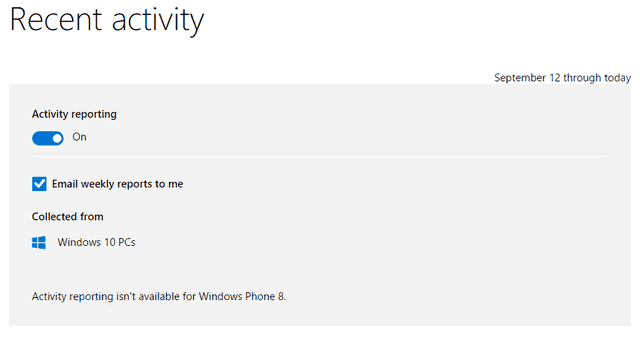
You as an administrator are having the option to manage the family members whose accounts are present on the PC. This means you can also manage your child’s account. Open the Recent Activity tab as it comes with the option to retrieve all the activities of your child. This will help you to monitor your child’s PC activity. You also get the option to receive all the e-mail reports on your registered e-mail address.
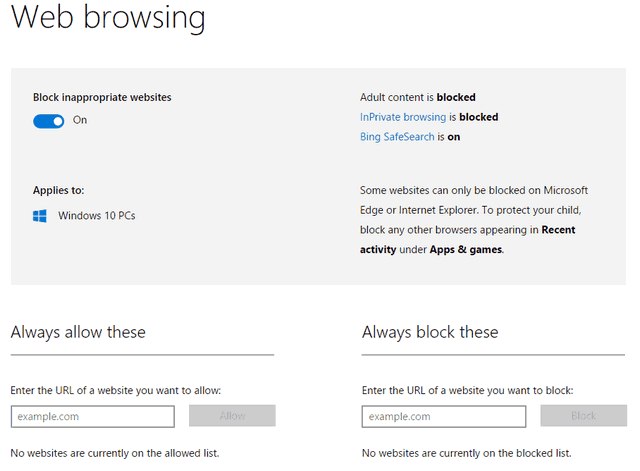
There are a lot of inappropriate websites on the internet. You should open the Web browsing tab and then block all the inappropriate websites. Once you have blocked all these websites, your child won’t be able to access them. Open Web browsing category and then you have to click on block inappropriate websites. There are two choices at this stage. You can either add the websites which you want to block so that your child can’t see them or you can add the websites which you want your child to use. In this way, you can only add the educational websites.
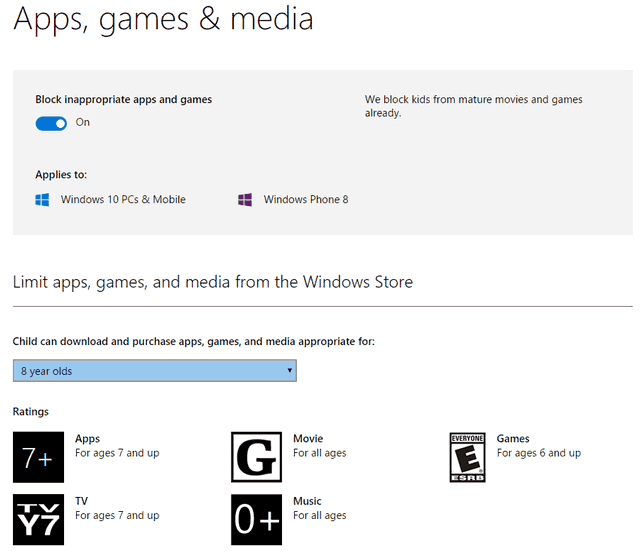
Another category which you will find is limiting the apps, games & media. There are different age groups listed on this page. Select the age group which you think is appropriate for your child and games belonging to that age group only will be available for playing.
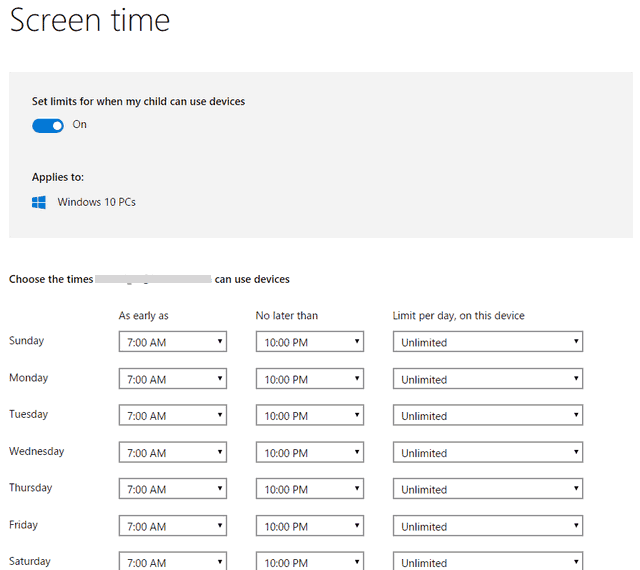
Another interesting setting in Windows 10 user accounts is “Screen Time” settings. Screen time allows you to set the maximum amount of time they can spend on their devices. So, if you want to allows your kids to use the computer for only limited times hours then you can easily set the day and time according to your wish using the Screen Time option.
I hope, you found the complete information related to creating Windows 10 child account. This is one of the best guides which you will find on the internet to create child’s account on Windows 10 PC.
We hope you were able to create Windows 10 child account for your child easily. Please, feel free to use the comments section to clear – if you are having any doubts regarding Windows 10 child account set up or Windows 10 user accounts.
